Published:Zorapid.Ltd
If you’ve ever led an NPI (New Product Introduction) project, you know the biggest budget and timeline risk isn’t bad CAD design. It’s picking the wrong manufacturing process at the wrong stage.
Most hardware teams fall into one costly habit: they rush into injection molding too early. They spend thousands on custom molds, lock their design permanently, and then discover fit errors, assembly conflicts, or field-test failures. Every mold tweak costs hundreds or thousands of dollars and days of delays.
On the flip side, sticking to 3D printing forever kills your scalability and per-unit cost once your product is ready for market launch.
So how do you know exactly when 3D printing is the smarter choice for your NPI workflow — and when you should commit to injection molding?
This practical, jargon-free guide breaks down every real-world scenario. We share clear rules of thumb, cost comparisons, and engineer-tested advice to help you make faster, cheaper, lower-risk NPI decisions.
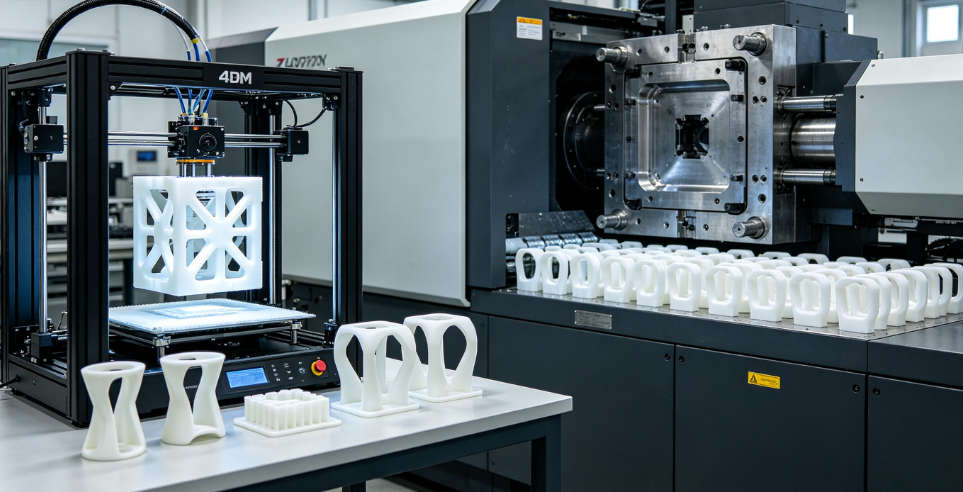
NPI Manufacturing Myth Busting
Let’s kill the two most common misconceptions holding back product teams:
Myth 1: Injection molding is always better for final products. Fact: Molding is better for high-volume, frozen designs. For iteration, testing, and low-batch NPI validation, it’s overkill and wasteful.
Myth 2: 3D printed parts are only for show prototypes.Fact: Modern industrial 3D printing (MJF, SLS, high-resin printing) producesfunctional, test-ready parts strong enough for official NPI validation, lab testing, and field pilot runs.
6 Scenarios Where 3D Printing Beats Injection Molding for NPI
If your current NPI project matches any of these cases, 3D printing is your best option.
1. Your Design Is Not Fully Frozen (90% of Early NPI Stages)
Almost every new product needs multiple revisions. You’ll adjust clearances, fix assembly gaps, relocate mounting points, and optimize thermal performance.
With injection molding, every small change means mold rework. Each modification costs money and pauses your entire NPI timeline.
With 3D printing? You edit your CAD file and print the updated part in 1–3 days. No tooling fees, no downtime, no hidden costs.
For any unfrozen design, 3D printing eliminates revision risk entirely.
2. You Need Fast Iterations to Meet Tight NPI Deadlines
NPI schedules are always compressed. You need to finish functional testing, reliability cycling, and certification checks before launch.
Injection molding requires 2–6 weeks just for tooling, before you get a single sample part.
3D printing delivers usable, test-ready parts in 24–72 hours. You can test 3–5 design iterations in the time it takes to manufacture one injection mold.
This speed directly shortens your time-to-market and helps you beat competitors in product launch cycles.
3. Your Parts Have Complex, Mold-Unfriendly Geometry
Modern consumer electronics, industrial devices, and medical products rely on advanced designs that break standard molding rules:
- Deep internal undercuts
- Organic curved ergonomic surfaces
- Internal channels for airflow or liquid routing
- Lattice structures and thin-walled lightweight features
To mold these features, you need expensive slides, lifters, and complex mold layouts. In many cases, you’ll be forced tosimplify your design just to make it moldable.
3D printing has zero geometry limits. It prints your exact CAD design without compromises, letting you validate your full engineering vision during NPI.
4. You’re Running Low-Volume Pilot Batches (1–500 Units)
All NPIs require small-batch production for:
- Beta customer field trials
- Internal reliability and stress testing
- Marketing samples and pre-launch demos
- Certification submission stock
Injection molding only saves money at scale. For small pilot runs, the upfront mold cost makes every single part extremely expensive.
3D printing has no MOQ and no tooling cost. You produce exactly the number of parts you need, with zero wasted inventory or overspending.
5. Your Product Requires Customization or Personalization
If your NPI involves custom enclosures, patient-matched devices, configurable industrial fixtures, or personalized consumer products — injection molding is impractical.
Molds only produce identical parts. Every new variant needs a new mold or costly rework.
3D printing lets you manufacture unique parts in the same batch, with zero setup changes. This is perfect for niche NPI lines that don’t fit mass-production models.
6. You Want to Eliminate Costly Launch Risks
The worst NPI failure is launching a product with untested molded parts. Many teams tool early, only to discover assembly failures, structural weaknesses, or usability flaws after mass production starts.
3D printing lets you de-risk every design choice. You validate fit, form, function, and durability before investing in permanent tooling. When you finally switch to injection molding, your launch is smooth, defect-free, and on schedule.
3D Printing vs Injection Molding: NPI Side-by-Side Comparison
Image Suggestion: Clean comparison infographic with cost curve, lead time, and use-case breakdown for NPI stages
| NPI Factor | 3D Printing | Injection Molding |
|---|---|---|
| Upfront Tooling Cost | $0 | $3,000–$50,000+ |
| Design Revision Cost | Near $0 (CAD update only) | High rework fees + production delays |
| First Part Lead Time | 1–3 business days | 2–6 weeks (tooling + sampling) |
| Best NPI Volume Range | 1–500 units (iteration & pilot) | 1,000+ units (mass launch) |
| Design Flexibility | Unlimited complex geometries | Mold-restricted, requires DFM simplification |
| Surface Consistency | Great for testing & pilots | Perfect for high-volume retail finish |
The Volume Break-Even Rule Every NPI Team Must Follow
Here is our standard, field-proven rule for all Zorapid NPI clients:
- 1–500 units + active design changes: Choose 3D Printing (saves total project cost)
- 500–1000 units + frozen design: Evaluate mold readiness
- 1000+ units + finalized design: Choose Injection Molding (lowest per-unit cost)
Most startups waste 20–40% of their NPI budget by molding parts below 1000 units with unfrozen designs.
Real NPI Case Study: How 3D Printing Avoided $7k+ in Mold Rework
A US industrial tech startup partnered with Zorapid to launch a new smart sensor enclosure. Initially, they planned to build an injection mold straight from their first CAD draft to speed up launch.
We recommended a 3D printing iteration phase first — and it saved their project.
Over 10 days, we printed four iterative prototype batches. The team discovered three critical issues invisible in CAD:
- Internal channel routing caused thermal overheating
- Mounting clearances created assembly jams
- External curvature conflicted with standard mounting hardware
After refining the design via 3D printing, the team locked their final file and launched a single, flawless injection mold. They avoided an estimated $7,000 in mold edits and cut their NPI timeline by three weeks.
When to Skip 3D Printing & Go Straight to Injection Molding
3D printing is not always the answer. Use injection molding immediately if you check all these boxes:
- Your design is 100% frozen with zero future revisions
- You need 1,000+ identical production units
- You require uniform cosmetic finish for retail or formal product launches
- Your part has simple geometry with no complex undercuts or lattice features
The best NPI strategy is hybrid: 3D print to validate, injection mold to scale.
Zorapid Optimized NPI Workflow
We help hardware teams avoid NPI guesswork with a streamlined process:
- Fast Iteration: 3D print all design revisions for fit, thermal, and structural testing
- DFM Optimization: Refine designs for future moldability while iterating
- Pilot Validation: Low-volume 3D printed batches for beta tests and certification
- Smooth Scale-Up: Transition frozen, validated designs to precision injection molding
FAQ
Are 3D printed parts valid for official NPI certification testing?
Yes. Industrial-grade SLS, MJF, and resin 3D prints deliver consistent strength and performance for lab testing, reliability cycling, and CE/FCC/FDA preliminary validation.
How many iterations should I 3D print before molding?
We recommend a minimum of 2–3 functional iterations to eliminate assembly and performance bugs before tooling investment.
Can 3D printing replace molding for small-batch full production?
Absolutely. For niche, low-volume, or customizable products, 3D printing acts as permanent production tooling with zero mold overhead.
Final Thoughts
Smart NPI management isn’t about choosing one manufacturing process forever. It’s about choosing the right tool for the right stage.
Use 3D printing for speed, flexibility, and risk-free iteration during product validation. Use injection molding for low-cost, high-volume mass production after your design is fully proven.
Get Your Free NPI Process Evaluation
Unsure whether to 3D print or mold your next NPI batch? Send us your CAD files and project details. Zorapid’s engineering team will deliver a transparent, no-fluff recommendation, free DFM feedback, and a 24-hour quote to keep your NPI on budget and on schedule.