Tired of fuzzy, stringy burrs ruining your turned POM/Delrin plastic parts? Grab Zorapid’s shop-proven full workflow to eliminate edge burrs during turning, cut manual deburr labor, and hold clean sharp edges for medical, fluid & electronic OEM plastic components.
If you run CNC lathes turning POM (Delrin/acetal) plastic day in and day out, burrs are your constant headache.
You finish a shaft, connector or fluid valve component, pull it out of the chuck, and see fuzzy plastic whiskers sticking to every edge, shoulder and thread exit.
POM is ultra-tough, ductile and low melting point. Unlike metal, it doesn’t shear cleanly when cutting conditions slip. Instead of breaking chips clean, the material stretches, tears and leaves messy burrs you have to sand, scrape or tumble off post-turning.
Extra deburring adds hours of manual labor, slows lead times, and creates inconsistent edge quality across batches. For medical sealing parts or precision electronic housings, leftover micro burrs even cause assembly jams and seal leakage.
Most machine shops only patch burr issues with random parameter tweaks or cheap hand deburr steps. At Zorapid, we’ve built a complete pre-emptive system to stop POM burrs forming in the turning cycle itself—before secondary finishing is needed.
This guide breaks down every actionable trick: material prep, design DFM rules, plastic-specific turning inserts, optimized speed/feed data, workholding, chip evacuation, finishing passes and post-turn stabilization. All tactics come straight from our lathe floor, validated on thousands of POM OEM prototypes and volume runs.
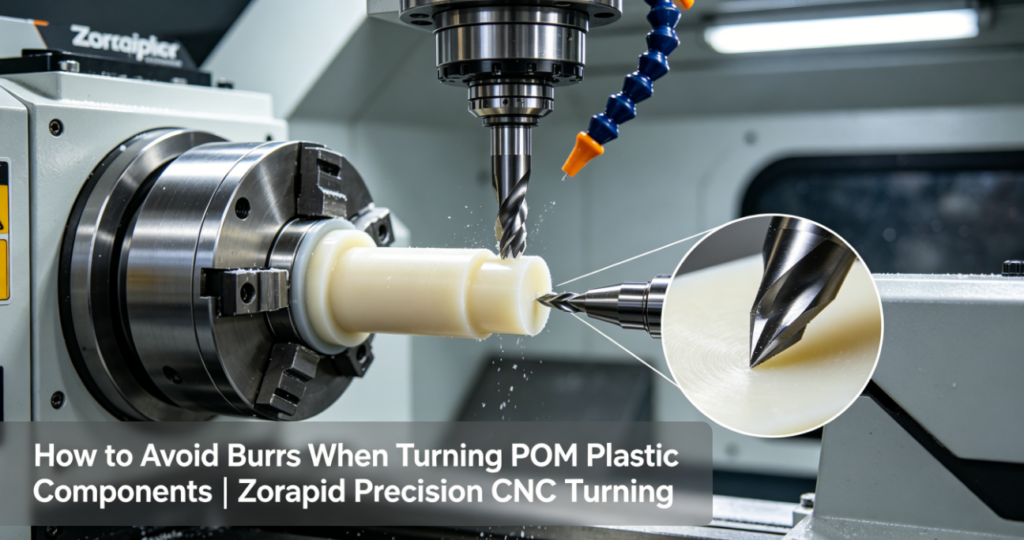
Why POM Plastic Makes Horrible Burrs During Turning
Before fixing burrs, let’s break down exactly why acetal creates fuzzy edges no other material matches. Every mistake below multiplies burr size drastically.
POM’s High Ductility = Material Stretches Instead of Shearing
POM has strong molecular chains that stretch easily under cutting force. When your tool edge isn’t razor sharp, it pushes plastic sideways instead of slicing cleanly.
Stretched plastic folds over the part’s exit edge and hardens into permanent whisker burrs as it cools. Thin walls, small threads and sharp shoulders amplify this effect tenfold.
Heat Buildup Melts POM, Reattaching Chips to Edges
POM softens fast above 90°C. Dull tools, slow feeds or poor chip evacuation trap friction heat at the cutting zone.
Melted acetal smears along edges, then cools into thick, hard burrs that won’t fall off during chip removal. Even light air blast can’t shift melted plastic residue once it sets.
Poor Tool Exit Geometry & Vibration Trigger Exit Burrs
When your turning tool pulls away from shoulders, bores or outer diameters, unsupported thin plastic edges vibrate. Vibration rips uneven material strands, creating heavy exit burrs.
Long overhang workpieces, loose chuck jaws and worn machine slides make vibration and burrs far worse.
Zorapid’s Full Zero-Burr POM Turning System
We split our burr-elimination workflow into 7 linked stages. Follow every step, and you’ll cut post-turn deburr work by 85% or more on all POM/Delrin components.
Raw POM Material Selection to Reduce Baseline Burr Risk
Start with the right stock—cheap unmodified POM-C guarantees heavier burrs no matter your tooling setup.
- Choose homogeneous unfilled POM-C for precision turning; glass-filled POM creates micro-tears and tiny hard burrs that are near impossible to eliminate.
- Pre-condition raw bar stock: Let POM blanks sit at workshop ambient temperature for 24 hours before turning. Temperature difference between stock and machine generates thermal stress that worsens edge stretching.
- Avoid recycled POM regrind material for sealing or medical parts—uneven molecular density creates inconsistent shear and random heavy burrs across batches.
Free DFM Design Tweaks to Cut Burr Formation Upfront
We share complimentary DFM reviews for all Zorapid POM turning orders. Small CAD adjustments eliminate over half of all burr hotspots before the lathe even runs:
- Add tiny 0.1–0.3mm chamfers to all sharp outer/inner shoulders and bore exits; chamfers give the tool a clean break point so plastic can’t fold over edges
- Replace sharp 90° internal corners with minimum R0.4 radii; sharp internal corners trap chips and tear POM into micro burrs
- Widen thread entry/exit reliefs for M2–M8 small POM threads—thread burrs are the most labor-intensive defect to remove manually
- Avoid ultra-thin cantilever walls thinner than 0.8mm; unsupported thin plastic vibrates severely during finish passes
- Separate heavy stock removal rough zones from critical sealing edges to prevent uneven stress pulling burrs on functional surfaces
POM-Specific Turning Insert Geometry
Wrong metal cutting inserts are the mistake shops make when turning Delrin. Our dedicated plastic insert rules eliminate tearing and smearing instantly:
- Insert Grade & Coating
- Uncoated polished K10/K20 carbide inserts are our standard for POM turning; polished surfaces stop POM adhesion and built-up edge (BUE)
- Skip TiAlN coated inserts—rough coating texture drags plastic and creates micro burrs; ZrN coating is acceptable only for high-volume continuous runs
- Never reuse inserts previously used for aluminum or steel; tiny edge nicks from metal machining will tear POM every cut
- Critical Insert Angles for Clean Shear
- Positive rake angle: 10°–15° (high positive slices POM rather than pushing it sideways)
- Clearance angle: 10°–12°, prevents tool flank rubbing and frictional melting
- Micro honed razor edge (0.02mm max edge radius); dull rounded edges stretch plastic and generate massive fuzzy burrs
- Nose Radius Selection
- Rough turning: 0.8mm nose radius for stable chip breaking
- Finish turning (zero-burr edge target): 0.4mm small nose radius, minimizes side cutting force that bends thin POM edges
Optimized Turning Speed & Feed Parameters (Zorapid Shop-Validated Data)
Balance speed and feed to shear POM clean without melting or stretching it. Below are our fixed production settings for solid POM bar turning:
- Cutting Speed (Vc): 180–320 m/min (avoid below 150 m/min—slow speed = rubbing + heat + burrs; avoid over 350 m/min—excess heat melts acetal)
- Feed Rate: 0.08–0.20 mm/rev
- Rough passes: 0.15–0.20 mm/rev to break short clean chips
- Final finish pass: 0.08–0.10 mm/rev ultra-light feed for crisp edges
- Depth of Cut Rules
- Roughing: Max 1.2mm axial depth per pass, never full-depth single cuts
- Critical finish edge pass: Only 0.03–0.08mm stock removal; tiny light cuts eliminate exit edge deflection entirely Key Rule: Never dwell the tool on any shoulder or edge. Dwell time traps heat and melts POM into permanent burr deposits.
Workholding & Vibration Control to Stop Edge Tearing
Vibration turns minor micro burrs into thick, unmanageable whiskers. Our fixture setup rules for POM lathe work:
- Use soft aluminum or polyurethane chuck jaws; serrated steel jaws create surface indentations and uneven clamping stress that amplifies vibration
- Support long slender POM shafts with tailstock centers at all times—unsupported bar stock flexes mid-cut and rips edge burrs
- Progressive low-torque chuck tightening; over-clamping locks internal plastic stress that releases as the tool cuts, bending edges
- Shorten tool overhang as much as possible; longer tool sticks vibrate heavily during finish passes on thin features
Chip Evacuation & Cooling (Stop Melted Chip Reattachment)
Trapped hot chips are the second biggest cause of permanent POM edge burrs. Our cooling & chip clearing process:
- Continuous high-pressure cold air blast targeted directly at the cutting edge zone
- Air blast breaks chips instantly and carries away friction heat before POM melts
- Avoid flood liquid coolant where possible; water can absorb into porous POM and cause dimensional shift post-machining
- Insert chip-breaker geometry is mandatory—curved chip breakers split long stringy POM swarf into small 3–8mm chips that can’t wrap around edges or re-melt onto finished surfaces
- Program short peck retracts every 5mm during deep bore turning to clear packed chips from internal shoulders
Staged Machining Sequence + Final Zero-Burr Finish Pass
One-shot rough-then-finish cutting leaves massive residual stress and exit burrs. Zorapid uses a two-stage controlled cycle for all precision POM parts:
- Roughing pass: Remove 90% of stock, leave uniform 0.1–0.15mm finish allowance on all edges, shoulders and threads
- Full tool retract + 5-minute air cool pause: Let the part drop back to ambient temperature to release cutting heat stress
- Single light finish pass: Run at reduced depth of cut, optimized low feed rate, full air blast active. This final pass shears any minor micro protrusions left by roughing into perfectly clean, burr-free edges with zero whiskers
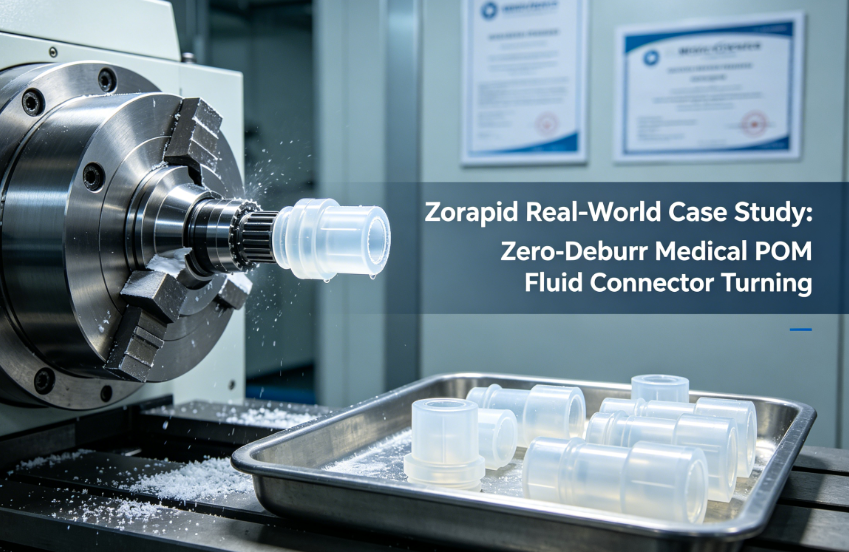
Zorapid Real-World Case Study: Zero-Deburr Medical POM Fluid Connector Turning
A medical OEM client came to us with severe burr issues on their POM fluid valve connectors.
Their old process used generic steel turning inserts, single-pass rough-finish cycles, no chamfer DFM relief, and minimal air cooling. Manual tumble deburr took 12 minutes per batch, and 22% of parts failed leak testing from leftover micro edge burrs on sealing surfaces.
We rolled out our full zero-burr POM turning workflow:
- Modified CAD with 0.2mm chamfers on all bore and OD shoulder exits
- Swapped to polished positive-rake K10 plastic-specific carbide inserts
- Implemented rough → cool pause → light finish staged turning parameters
- Added continuous targeted high-pressure air blast + tailstock support for slender connector bar stock
- Standardized 24-hour stock pre-conditioning before lathing
Measurable client results after process upgrade:
- Manual deburr time cut from 12 mins to under 1 min per batch
- Scrap rate from burr-related seal failure dropped from 22% to <0.8%
- All critical sealing edges burr-free straight off the lathe, no secondary tumbling required
- Consistent surface finish Ra ≤0.8μm across all production runs
Quick Troubleshooting Cheat Sheet for POM Turning Burr Defects
Scan this table to diagnose and fix burr issues mid-lathe production run instantly:
- Long stringy whisker burrs on OD shoulders Root Cause: Dull unpolished insert, feed rate too low, insufficient air blast cooling Fix: Replace with sharp polished positive-rake insert, bump feed to 0.12–0.18 mm/rev, boost air pressure at cutting zone
- Hard melted plastic burrs stuck to bore edges Root Cause: Excess cutting heat, trapped packed chips, dwell time on internal corners Fix: Reduce spindle speed slightly, add peck retract chip clearing, remove all tool dwell commands
- Micro fuzzy burrs on M2–M6 small POM threads Root Cause: Sharp thread entry/exit with no relief radii, thin unsupported thread walls Fix: Add thread relief chamfers in CAD, use small 0.4mm nose radius finishing insert
- Uneven patchy burrs only on one side of the part Root Cause: Vibration from long workpiece overhang, loose chuck clamping Fix: Add tailstock support, re-tighten jaws with progressive low torque, shorten tool stick-out
- Tiny hard glass-filled micro burrs that resist tumble deburr Root Cause: Glass-fiber reinforced POM stock, worn insert edge micro nicks Fix: Switch to unfilled POM-C for sealing components, replace inserts at first sign of edge wear
Why Zorapid Delivers Consistently Burr-Free POM Turning Competitors Can’t Match
Most precision shops only tackle one piece of the burr puzzle—either tooling or cooling alone. Our integrated full-process system built exclusively for acetal plastic turning sets us apart:
- Dedicated plastic-only carbide insert inventory; we never cross-use metal cutting tools for POM jobs to avoid edge nicks
- Free upfront DFM engineering feedback to eliminate burr hotspots before any bar stock hits the lathe
- Rigid Swiss and standard CNC lathes with built-in high-pressure cold air chip evacuation systems
- In-house material pre-conditioning station to stabilize POM stock temperature 24 hours pre-turning
- Standardized staged rough-cool-finish turning cycles locked into all production G-code templates
- Full visual edge inspection post-turning to verify zero micro burrs before secondary surface finishing
- ISO-certified plastic machining workflow for medical, food contact and electronic OEM POM components, 20+ years precision manufacturing experience
FAQ
Can I fully eliminate all POM burrs without manual secondary deburring?
Yes, for standard unfilled POM-C parts with proper DFM chamfer relief, sharp plastic inserts and our staged finish turning cycle. Glass-filled POM will leave negligible micro protrusions that only require light tumble polishing, no hand scraping.
Is it worth upgrading to polished plastic-specific inserts for POM turning?
Absolutely. Generic metal inserts create 3–5x larger burrs, raise deburr labor costs, and wear out far faster on acetal. The small insert upcharge pays for itself within one production batch via reduced scrap and labor time.
Should I use liquid coolant or air blast for zero-burr POM turning?
Cold high-pressure air blast is our top recommendation. Liquid coolant can absorb into POM, causing dimensional swelling and warpage days after machining. Mist coolant is acceptable only for heavy roughing stock removal stages.
How do I stop burrs on ultra-thin wall POM turned sleeves under 1mm wall thickness?
Three mandatory fixes: Add internal/external reinforcing radii in CAD, full tailstock support to eliminate vibration, and two ultra-light finish passes with 0.05mm maximum depth of cut each pass.
Conclusion
Stopping burrs during POM turning is not a single quick hack—it’s a coordinated full workflow: stable pre-conditioned raw stock, burr-optimized DFM design, plastic-specific sharp turning inserts, balanced speed/feed cutting data, vibration-free workholding, continuous chip cooling evacuation, and staged light finishing passes.
If your current POM turning process wastes hours on manual deburring, struggles with fuzzy whisker edges, or hits high scrap rates from burr-caused assembly/leak failures, Zorapid’s field-proven zero-burr turning system removes those production pain points permanently.
We offer complimentary CAD DFM reviews for all POM/Delrin precision turning projects, plus fast quotes for prototype and volume plastic CNC lathe machining.
Upload your part CAD drawing today to get custom engineering guidance to eliminate turning burrs on your acetal components.