Published:Zorapid.Ltd
If you work with injection molding, you’ve seen these three defects over and over: sink marks dimming cosmetic surfaces, warped parts that fail assembly, flash that needs hours of manual trimming.
Most teams jump straight to tweaking machine pressure or temperature. But 80% of molding flaws start with part design or mold setup — not machine parameters.
The best part? You don’t need expensive mold rework or full tool rebuilds to fix them. Small, simple adjustments to CAD geometry, mold cooling, or machine settings wipe out sink marks, warpage, and flash for good.
This guide uses plain shop-floor language, zero confusing textbook jargon, and delivers actionable, low-cost fixes you can apply to your next project today. Every tip is field-tested by Zorapid’s in-house mold design and molding team for consumer, medical, and electronics plastic components.
Fast Root Cause Breakdown + Easy Fixes for Each Defect
Sink Marks: Where They Happen & 7 Simple Remedies
What sink marks look like
Dents, dimples, or shallow indentations on smooth plastic surfaces, usually directly opposite thick ribs, bosses, or heavy wall sections. Thick plastic cools slower and shrinks inward, pulling the outer surface down.
Simple, low-effort fixes (ranked fastest to implement)
- Thin down thick wall sections Keep uniform wall thickness between 1.2mm–2.5mm for standard ABS/PC. Any wall over 3mm creates guaranteed sink spots. Reduce thick bosses and ribs to match main wall thickness.
- Add core-out pockets to heavy geometry Hollow out solid thick bosses from the non-cosmetic side. Less plastic mass = less shrinkage as it cools.
- Boost holding pressure & extend hold time Increase pack pressure slightly and hold longer during injection. This packs extra molten plastic into shrinking areas before full cooling.
- Slow down injection speed Fast fill traps air and uneven packing. Slower flow distributes material evenly across thick and thin sections.
- Optimize mold cooling lines Add cooling channels close to thick ribs/bosses. Faster equal cooling minimizes uneven shrinkage pull.
- Add small sink gates near thick geometry Gate placement directly beside heavy wall sections delivers fresh pressurized plastic to shrinking zones.
- Adjust material shrink rate via DFM tweaks Switch to low-shrink resin blends (filled PC, glass-filled ABS) if cosmetic flatness is critical.
Warpage: Uneven Shrinkage Fixes (Design + Mold + Process)
What warpage looks like
Twisted, bent, or curved plastic parts after ejection. Uneven cooling, inconsistent wall thickness, unbalanced fiber orientation, or uneven mold temperature are the main triggers.
Easy fixes grouped by category
Design Fixes (No mold changes needed)
- Maintain fully uniform wall thickness everywhere. Alternating thin and thick walls create uneven shrink pull.
- Balance rib layout symmetrically around the part center. Asymmetrical ribbing pulls plastic one way as it cools.
- Add fillets to all sharp internal corners to distribute shrinkage evenly.
- Use symmetrical draft angles on both core and cavity sides. Uneven draft causes uneven surface friction during ejection.
Mold Cooling Fixes (Minor mold tweak only)
- Run matching coolant temperatures on core and cavity plates. Hot one side, cold the other = instant bending.
- Add baffles or bubblers to deep rib areas to eliminate hot spots. Hot zones shrink slower and pull the part out of flatness.
Machine Process Fixes (Zero mold rework, instant test)
- Lower melt temperature slightly to reduce total material shrinkage.
- Extend full cooling cycle before ejection. Pulling parts too early while soft locks in permanent bend.
- Balance fill speed so plastic flows equally on left and right sides of the mold.
Flash: Thin Extra Plastic Edges — Instant Low-Cost Solutions
What flash looks like
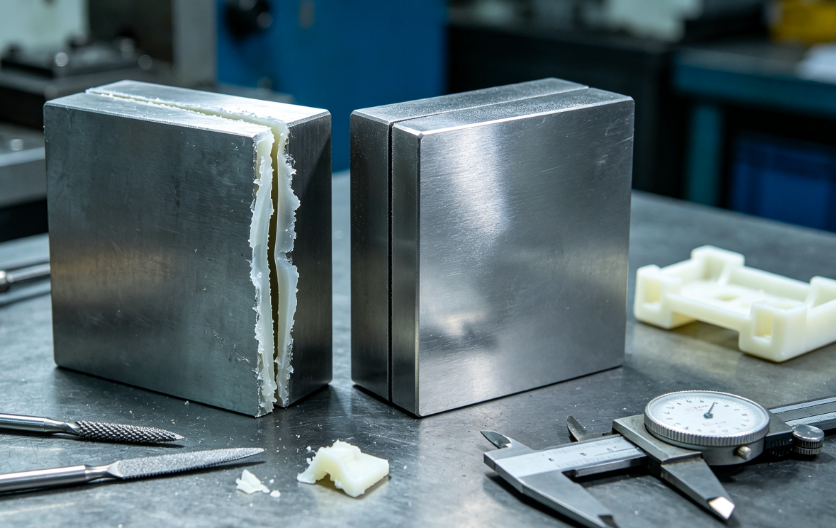
Thin, feathery plastic burrs spilling along mold parting lines, pin pins, ejector pins, or slide shut-offs. Flash ruins fitment and requires manual trimming labor.
Quick simple fixes, ordered by cost
- Lower injection and holding pressure Over-pressure shoves molten plastic into tiny gaps between mold steel splits. Reduce pressure in small increments to eliminate overflow.
- Shorten injection fill time Slow fill cuts the force pushing plastic across parting line gaps.
- Lower melt temperature Hot resin flows thinner and seeps into micro gaps easier. Cool material reduces flash risk dramatically.
- Clean and reseat mold parting lines Dirt, plastic residue, or minor dents on mating mold surfaces create small gaps. Polish parting lines to tight contact.
- Tighten mold clamp tonnage Insufficient clamp force pulls mold halves slightly apart during injection, opening gaps for flash. Boost clamp tonnage to match part projected area.
- Add vent channels with proper depth Over-sized vents are a common flash source. Keep vent depth under 0.02mm for standard thermoplastics.
Combined DFM Rules To Prevent All Three Defects At Once
You can avoid sink marks, warpage, and flash before cutting any mold steel with these universal design rules:
- Uniform wall thickness (1.5mm–2.2mm ideal for most plastics)
- Core out all solid thick bosses, ribs, and mounting posts
- Symmetrical part geometry and balanced rib layout
- Minimum 0.5mm internal radii on all corners
- Balanced gate placement near thick geometry zones
- Symmetric cooling path layout across core and cavity
- Consistent draft angles on all vertical surfaces
- Tight controlled vent depths on all parting lines
At Zorapid, every injection molding project gets a free DFM check that flags all geometry that would trigger sink, warpage, or flash. We adjust your CAD first, so you avoid costly mold revisions after tool fabrication.
Real Client Molding Case Study: Fixed All Three Defects In One DFM Pass
A consumer electronics brand sent us a plastic device housing with three major molding issues:
- Heavy mounting bosses created deep sink marks on front cosmetic surfaces
- Asymmetrical internal ribs caused severe warpage after cooling
- Flash appeared along all long parting lines due to uneven wall thickness and over-sized vents
Zorapid’s Simple Fixes
- Core out thick bosses to match main wall thickness (eliminated sink marks)
- Symmetrize internal rib layout and add balanced fillets (stopped warpage)
- Resize vents to 0.015mm depth + adjust recommended injection pressure window (removed flash entirely)
No mold rework was needed after the initial tool build. The revised design passed first-shot production, cut scrap rate from 32% down to under 2%, and eliminated all manual flash trimming labor.
Quick Reference Cheat Sheet (Defect → Cause → Simple Fix)
| Molding Defect | Primary Root Cause | Fastest Simple Fix |
|---|---|---|
| Sink Marks | Uneven thick wall / slow cooling shrinkage | Core out thick bosses; boost hold pressure |
| Warpage | Asymmetric shrinkage, unbalanced cooling | Uniform wall thickness; match core/cavity mold temp |
| Flash | Excess pressure / large mold gaps / hot melt | Lower injection pressure; tighten vent depth |
FAQ
Can I fix sink marks without modifying my part CAD?
Minor sink can be reduced via higher hold pressure and longer cooling cycles. Severe sink almost always requires thinning or core-out thick geometry — process tweaks alone will not fully erase cosmetic dimples.
Is warpage always fixable with machine settings only?
Minor warpage can be adjusted with cooling time and melt temp. Heavy permanent bending comes from unbalanced wall geometry; design edits are required for a permanent solution.
How much does removing flash increase production cost?
Flash requires manual trimming, secondary sanding, or tumbling — all extra labor time. Applying the simple mold vent and pressure fixes cuts post-processing labor costs drastically long-term.
Will Zorapid’s DFM analysis flag sink, warpage and flash risks upfront?
Yes. Our standard free DFM molding review scans wall thickness balance, rib symmetry, boss mass, vent layout and parting line design to predict all three defects before mold manufacturing begins.
Do glass-filled plastics have worse sink and warpage issues?
Glass-filled resins shrink less, reducing sink marks. But uneven fiber alignment can amplify warpage — symmetrical rib design and balanced cooling become even more critical for filled materials.
Wrap-Up
Sink marks, warpage, and flash are the three most costly injection molding defects. The good news: none require complicated, expensive repairs.
Small design tweaks, minor mold cooling adjustments, and simple machine parameter shifts eliminate scrap, cut manual finishing work, and speed up your production runs. The cheapest fix of all is a pre-mold DFM review to catch risky geometry before you build tool steel.
As a full-service injection molding supplier, Zorapid combines DFM design optimization, precision mold building, and in-house molding testing to avoid these common defects from the first prototype shot to mass production.
Get Your Free DFM Molding Analysis Today
Send your plastic part CAD files and material specs. Our mold engineering team will flag all sink, warpage, and flash risk areas, plus share simple design edits to deliver flawless molded parts with zero extra scrap cost.