Published by Zorapid
You need 20, 150 or 400 finished parts.
Your product is still getting small design tweaks.
Now you face one big call:
Do you order 3D printed parts right away?
Or pay thousands to build a traditional mold first?
Most engineering teams pick the wrong option and burn cash on unnecessary tooling.
Others wait weeks for molds and miss product launch windows.
In this post, we break down every real-world tradeoff.
No fancy jargon. Just hard numbers, lead times and clear rules you can use today.
Zorapid runs low-volume hybrid manufacturing for aerospace, medical and automotive OEMs.
We see this decision play out every single week.
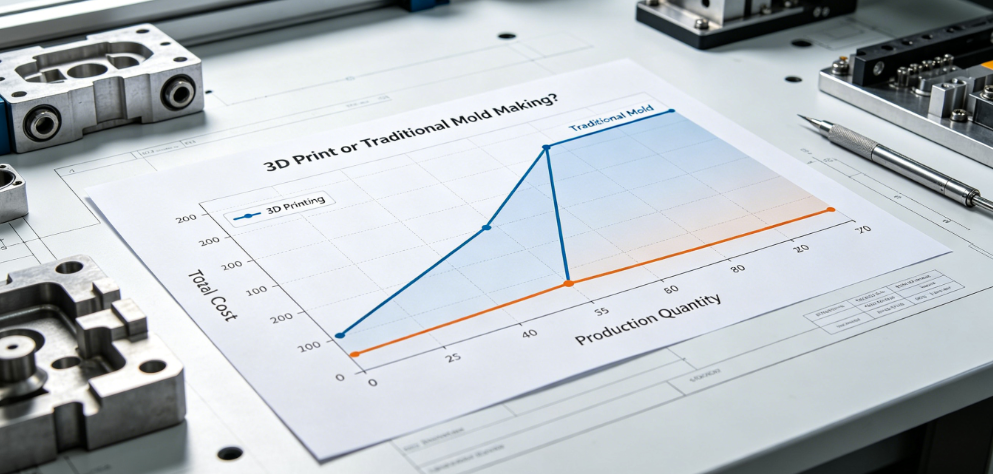
The Core Difference: Upfront Cost Makes All The Gap
Traditional Mold (Aluminum Soft Tool / Bridge Mold)
- Big one-time NRE cost first.
- Even a simple low-volume aluminum mold runs $2,500 to $12,000.
- You pay this money before you make a single part.
- The more complex your geometry, the higher the mold bill.
This cost only makes sense if you split it across thousands of units.
If you only need 50 to 300 pieces? That tooling cost blows up your per-unit price.
Design changes? You have to rework the mold, adding more cost and delays.
3D Printing (SLS, MJF, SLM, SLA for end-use parts)
- Zero mold cost. Zero tooling cost.
- You upload your CAD file, and we start production immediately.
- No custom fixtures. No steel cutting. No mold modification fees.
- Every design revision only costs material and print time. No extra tool bill.
Quick cost rule of thumb we use at Zorapid:
1–300 units: 3D printing almost always wins on total project cost.
300–1,000 units: Compare carefully between MJF printing and low-cost soft molds.
1,000+ identical unchanged parts: Traditional bridge molds start to pull ahead on per-piece pricing.Lead Time: Who Gets Parts On Your Desk Faster?
Low-volume NPI projects live or die on speed.
Traditional Mold Making Workflow
- DFM review
- CNC machine the aluminum mold
- Heat treatment & surface polishing
- First trial shot
- Fix warpage, sink marks or flashing Total turnaround: 25 to 45 business days, minimum. If your part has thin walls or deep undercuts? Add 2 more weeks.
Zorapid 3D Printing Workflow
- Check CAD file online
- Queue the job overnight
- Print + post-processing (sanding, tumbling, coating) Finished small batches ship out in 3–7 working days. No waiting for tooling. No trial runs. No mold rework cycles.
For startup launches or emergency spare parts? This time gap is game-changing.
Design Freedom: Tweak Your Model Without Penalty
Traditional molds lock your design down hard.
Mold rules force strict limits:
- Fixed draft angles
- No sharp internal lattice structures
- Limited deep undercuts Every edit needs mold rework, extra labor and more downtime.
3D printing removes nearly all manufacturing limits.
You can build:
- Thin wall features down to 0.6 mm
- Complex internal channels
- Organic lattice lightweight structures
- Custom one-off variants in the same batch
You can revise your CAD file three times in one week.
We print the new version every time, with zero extra setup cost.
Perfect for iterative testing during product development.
Defect Gap We See Every Day
Molded low-volume runs often suffer:
Warpage, sink marks, edge chipping and inconsistent surface finish.
Small trial batches do not leave enough room to stabilize molding parameters.
Well-calibrated industrial 3D printing from Zorapid delivers stable repeatability.
No molding defects in short runs.
Material Match: Can 3D Printing Make Real End-Use Parts?
Old myth: 3D prints are only fragile prototypes.
That is no longer true for low-volume production.
At Zorapid, we run production-grade printing materials:
- SLS Nylon GF-PA66, fire-resistant industrial plastic
- MJF production polypropylene
- SLM titanium Ti-6Al-4V & Inconel 718 metal parts
- Medical-grade PEEK & biocompatible photopolymer resin
These printed parts pass tensile, temperature and fatigue testing.
They work as finished commercial components, not just display samples.
Where molds still hold material advantage:
High-volume food-grade injection resins, transparent optical plastics in huge runs.
But for small batches of engineered plastic and metal? 3D printing meets full production specs.
Clear Decision Matrix
| Scenario | Best Choice | Reason |
|---|---|---|
| 1–300 parts + frequent design edits | Industrial 3D Printing | No NRE, fast iterations, lower total cost |
| 300–800 fixed identical parts | Compare both options | Run quotes for MJF printing vs aluminum soft mold |
| 800–10,000 unchanged identical units | Traditional soft bridge mold | Per-unit cost drops sharply with scale |
| Complex lattice / thin wall / internal features | 3D Print | Molds cannot replicate these structures economically |
| Tight timeline, launch within 10 days | 3D Print | Mold lead time cannot catch up |
| Medical / aerospace low-volume metal components | SLM Metal 3D Printing | Avoid expensive EDM mold machining |
The Middle Ground: Zorapid Hybrid Low-Volume Workflow
Many customers do not pick only one method.
They combine both technologies to cut total risk.
Our standard hybrid NPI process:
- Run 50–200 units via 3D printing to fully validate fit, form and function.
- Lock the final CAD design with no more changes.
- If demand grows above 800 pieces, build a low-cost aluminum soft mold.
This two-step plan avoids sinking money into molds for untested designs.
You skip costly mold rework caused by late-stage design tweaks.
This is the most budget-friendly path for most low-volume OEM projects.
Zorapid handles both additive manufacturing and short-run molding under one roof.
You only need one supplier for the whole transition from prototype to low-volume mass production.
Common Cost Traps You Must Avoid
- Don’t build a steel production mold for 200 pieces. The NRE will ruin your budget.
- Don’t use desktop consumer 3D printers for end-use production parts. You get poor layer lines and inconsistent quality. Always use industrial SLS / SLM equipment.
- Don’t freeze your CAD file too early just to justify mold costs. Iterate first with printed parts.
- Don’t switch suppliers mid-project. Handing files between 3D print shops and mold makers causes delays and tolerance drift.
Final Verdict
- If your run is small and your design still evolves: Choose industrial 3D printing. Zero tooling cost, fast delivery, full design freedom.
- If you have a locked design with hundreds of identical pieces and stable long-term orders: Traditional aluminum bridge molds start to make financial sense.
- For most NPI low-volume OEM projects: Hybrid 3D print first, mold later is the safest, cheapest route.
If you send your CAD file to Zorapid, we will run two free side-by-side quotes: one for 3D printed batches, one for soft mold short runs.
We lay out cost, lead time and surface quality so you can decide without guesswork.
FAQ
Is 3D printing good enough for end-use low volume parts?
Yes. We use production-grade SLS, MJF and SLM machines. Our printed plastic and metal parts pass industrial performance testing.
How much does a low-volume aluminum soft mold cost?
Simple small molds start at $2,500. Complex thin-wall tooling can hit $12,000 before production starts.
What quantity makes molding cheaper than 3D printing?
Usually above 800 identical unchanged parts. We calculate the break-even point for every customer’s project free of charge.
Can Zorapid handle both 3D printing and short-run molding?
Yes. Our 3,000 sqm smart factory runs hybrid manufacturing. We manage the whole low-volume transition in-house.