Publisher: Zorapid.Ltd
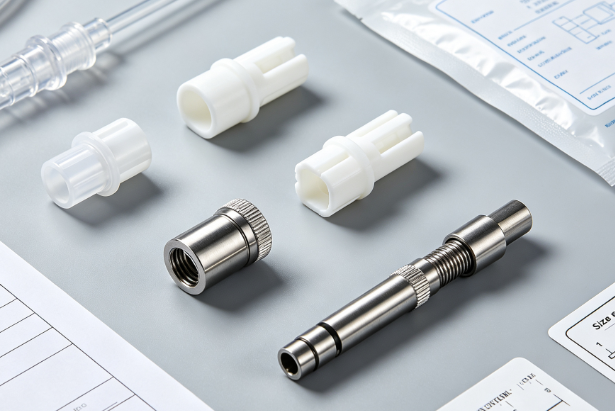
If you turn PEEK medical sleeves or POM (Delrin) precision shafts on CNC lathes, edge burrs drive you crazy.
You finish OD and bore turning. The cut looks clean on the lathe.
Then you pull the part out and find fine whisker burrs hanging on every sharp corner and exit face.
PEEK stretches and tears instead of shearing cleanly. POM melts and smears into sticky edge flash.
Manual deburring adds extra labor, ruins tight tolerances, and scratches critical sealing surfaces.
For medical-grade PEEK parts, secondary hand finishing even risks contamination.
At Zorapid, we run hundreds of PEEK and POM turning jobs for European and North American medical, semiconductor and automation clients.
We completely eliminate edge burrs right on the lathe, with zero post-processing work.
Today we break down every root cause and actionable turning tip, strictly focused on stopping burrs before they form. All methods are proven on our Swiss-type and conventional CNC lathes.
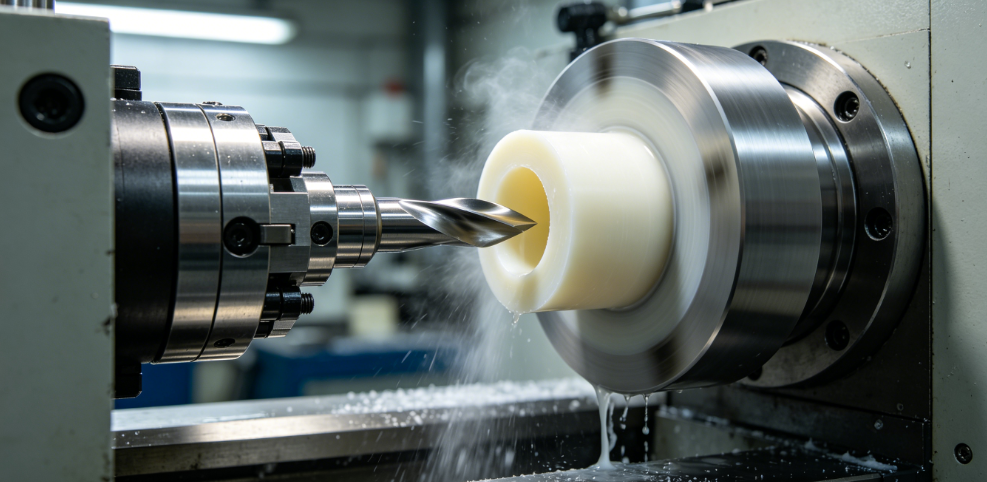
Why PEEK & POM Always Grow Edge Burrs During Turning
Most burrs do not come from poor tool maintenance alone. They stem from the unique polymer properties of these two plastics.
- PEEK has extremely high ductility. Instead of clean fracture, the material stretches ahead of the cutting edge and folds over into a fuzzy burr.
- POM (Acetal / Delrin) softens easily from friction heat. Low cutting speed makes the tool rub and smear plastic, creating melted flash along part edges.
- Dull cutting edges plow material rather than slice it. Compressive force pushes material sideways instead of shearing chips free cleanly.
- Exit edges are the worst trouble spot. When the tool breaks through the end face, unsupported material folds outward into thick exit burrs.
- Slow feed rates cause rubbing friction, building heat and making the polymer flow instead of separating cleanly.
Most shops only fix burrs after machining with tumbling or hand scraping. We stop burr formation entirely by adjusting tooling, parameters and cutting sequence.
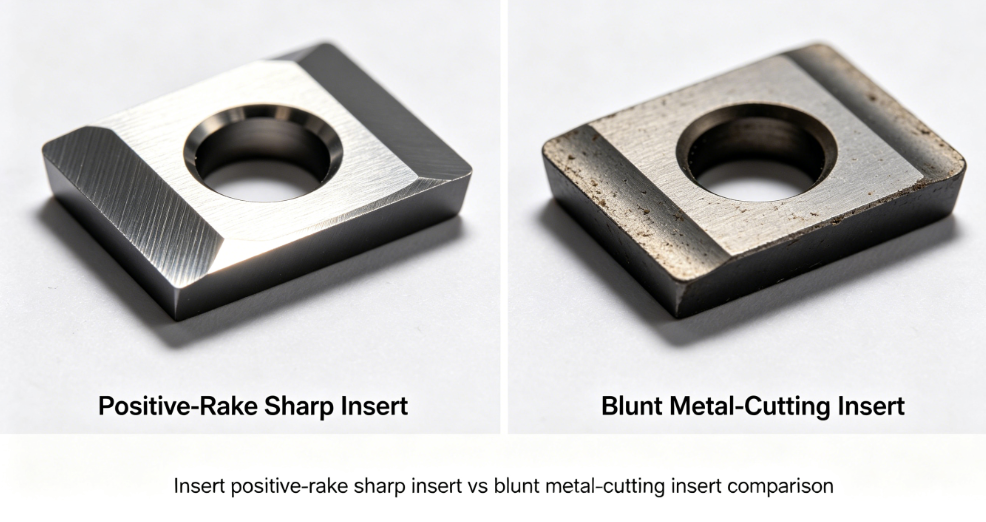
Use Razor-Sharp Inserts With Positive Rake Geometry
Tool shape makes or breaks burr-free plastic turning. Metal turning inserts will always leave fuzzy edges on PEEK and POM.
Zorapid Standard Tool Geometry
- Rake angle: +12° ~ +18° high positive rake to lift and shear material, never plow it
- Clearance angle: 15° ~ 25°, to eliminate flank rubbing against the freshly cut surface
- Cutting edge: Zero edge hone, perfectly sharp honed tip. Even a tiny 0.02mm edge radius will start pushing plastic and create burrs.
Tool Material Selection
- Unfilled virgin PEEK & POM: Fine-grain solid carbide inserts with polished flutes, no built-up edge.
- Glass-filled / carbon-filled PEEK (GF30 / CF30): DLC diamond-coated or PCD tipped inserts. Filled grades quickly wear down ordinary carbide, and dull edges bring heavy burrs right away.
Hard rule we enforce on every lathe:
Replace inserts at the very first sign of fuzzy edge whiskers. Do not run dull tooling for cost savings — deburring labor costs far more than new inserts.
Tune Feeds & Speeds to Avoid Rubbing & Melting
Slow spindle speed and low feed are the top two mistakes for plastic turning.
When the tool rubs instead of shearing, polymer material flows and folds over the edge.
We split our turning parameters strictly for PEEK and POM to keep clean chip separation.
POM (Delrin Acetal) Turning (Burr-Free Finishing)
- Cutting speed SFM: 450 ~ 600 (high spindle RPM)
- Feed rate: 0.08 ~ 0.15 mm per revolution (keep feed high enough to prevent rubbing)
- Finishing depth of cut: 0.15 ~ 0.3mm light passes, no heavy single cuts
Virgin Unfilled PEEK Turning (Medical Grade)
- Cutting speed SFM: 350 ~ 500
- Feed rate: 0.06 ~ 0.12 mm/rev
- Keep consistent chip load so the tool slices cleanly without stretching the polymer
Critical Anti-Burr Rule
Never run slow feed finishing on plastics.
Low feed = edge rubbing = heat buildup = stretched burrs.
A slightly higher feed creates crisp chips and clean breakage at the edge.
Control Heat — No Flood Coolant For Burr-Free Polymer Machining
Heat softens both PEEK and POM, turning sharp cuts into smeared, folded burrs.
Liquid flood coolant creates thermal shock and trapped heat inside the cut zone.
Melted plastic reattaches to the edge and forms flash.
Our Cooling SOP
- For medical-grade clean PEEK parts: Dry turning with continuous compressed air blast only. Air blows chips away and keeps cutting temperature low without liquid contamination.
- For POM mass production: Use minimal mist cooling only. Never flood the cut zone.
- Stop long continuous turning cycles. Pause the lathe briefly to let the part cool fully before finishing sharp corner edges. Hot plastic always bends and creates burrs; cool plastic shears cleanly.
Eliminate Exit Edge Burrs With Lead Chamfers
Exit burrs on the end face of turned shafts are the most stubborn defect.
When the cutting tool breaks through the unsupported end of the rod, the thin rim folds outward instantly.
Two Simple Lathe Fixes
- Machine a small 0.3×45° lead chamfer on the blank end before OD turning. The tool exits through the angled chamfer instead of a sharp square edge. No unsupported rim means zero folded exit burrs.
- Program the tool to slow feed slightly in the last 0.5mm before breaking through the end face. The chip fractures cleanly instead of tearing the plastic edge.
We add this tiny chamfer on every PEEK and POM shaft blank, and exit burrs disappear completely.
Split Roughing & Finishing — Avoid Compressive Cutting Stress
Heavy roughing passes squeeze the plastic and build residual stress inside the workpiece.
When you make the final finishing cut, stressed material pops outward and creates fine edge whiskers.
Optimized Turning Sequence
- Rough turn all OD and bore features, leave only 0.2~0.3mm uniform finishing stock.
- Stop the lathe, release the part from the chuck, let it stabilize fully to room temperature to release cutting stress.
- Re-clamp lightly with soft jaws, then run light finishing passes with sharp inserts. One-shot rough + finish turning always leaves burrs on ductile polymers. Two-stage machining keeps edges crisp.
Extra fixture note: Use padded soft jaws. Over-tight chuck pressure compresses PEEK and POM stock, leading to edge deformation after cutting.
Program Tool Path to Avoid Pulling Material Over Sharp Corners
Sharp internal and external corners trap material flow and form micro-burrs.
We use two programming tricks on CNC lathes:
- Round sharp internal corners with small R0.2~R0.3 radii in the finishing pass. This spreads shear force evenly and prevents material from folding over the corner edge.
- Turn radii first before straight OD sections, so chips break cleanly without dragging across sharp edges.
- For thin-walled PEEK sleeves, finish the bore first, then turn the outer diameter. The thick solid OD keeps rigidity and stops edge tearing during boring.
Separate OD Turning & Facing to Prevent Cross-Edge Burrs
Most operators turn OD then face the end face in one continuous program.
The facing tool drags along the OD edge and rolls a thin burr right at the shoulder.
Simple Process Fix
- Complete all OD turning first.
- Retract the OD tool fully away from the part.
- Bring in the facing tool to machine the end face separately. No tool dragging across finished edges means zero shoulder burrs. This small program change eliminates 80% of shoulder flash on POM shafts and PEEK sleeves.
5 Common Burr Types & Fast Lathe Fix Cheat Sheet
| Burr Location | Root Cause | Instant Turning Correction |
|---|---|---|
| Fine whiskers on OD straight edges | Dull insert + slow feed | Switch to sharp positive-rake tool, raise feed rate |
| Thick flash on exit end face | Unsupported sharp break-through | Add small 45° lead chamfer before OD turning |
| Melted sticky edge burr on POM | Excessive friction heat | Switch from flood coolant to air blast, raise spindle RPM |
| Micro-burrs on sharp inside corners | Compressive cutting force | Add small corner radius, split rough & finish passes |
| Shoulder burr at OD-to-face step | Tool drag between OD and facing | Separate OD turning and facing into independent operations |
Zorapid Full Burr-Free Turning Workflow for PEEK & POM
Copy this SOP into your CNC lathe program to cut edge burrs down to zero:
- Anneal PEEK rod stock first (200°C soak then slow cool) to release extrusion stress. POM does not require pre-annealing.
- Clamp blank lightly with padded soft jaws, avoid over-compression.
- Machine a small end chamfer to block exit burr formation.
- Rough turn OD and bore, leave 0.25mm finishing stock, then pause for full cooling.
- Use high positive-rake sharp carbide inserts with air-only cooling.
- Run light finishing OD turning first, fully retract the tool.
- Run facing operation separately with no cross-edge dragging.
- Finish sharp corners with small radii for clean chip fracture.
Shop Floor Result:
- Old process: 90% of parts needed manual deburring
- Optimized turning process: Zero edge burrs right off the lathe; secondary finishing eliminated entirely
Real EU Client Project Case (Medical PEEK Implant Sleeve)
A Belgian medical OEM sent us batches of unfilled ISO 10993 PEEK thin-wall sleeves.
Their CNC lathe process kept creating fine fuzzy burrs on every OD sharp edge.
Manual scraping damaged the sealing surface and raised contamination risks for implant-grade material.
We revised the full turning process strictly following our anti-burr rules:
- Pre-anneal PEEK rod to release internal stress
- Switch inserts to sharp +15° positive-rake polished carbide tips
- Split OD turning and facing into separate tool operations
- Add lead chamfers on all blank ends and run compressed air dry cooling
- Run two-stage rough + finish turning with full cooling pause between passes
Final outcome:
Perfect crisp zero-burr edges directly from the lathe. No hand deburring required.
All sleeves passed visual and microscopic edge inspection for medical production, with zero surface damage.
Conclusion
PEEK and POM burrs do not have to be fixed after machining.
You can stop them entirely on the CNC lathe by controlling three core factors:
- Razor-sharp positive-rake cutting tools that shear instead of plowing plastic
- Tuned high-feed turning parameters to avoid rubbing and heat melting
- Smart cutting sequence, chamfer lead-ins and separate OD/facing operations to eliminate folded edge material. You save massive labor cost by cutting out all secondary deburring work. At Zorapid, we specialize in burr-free turning of medical-grade PEEK and precision POM shafts for automation and semiconductor equipment across Europe and North America. If you keep fighting whisker burrs and edge flash on plastic turned parts, send your print and material grade. Our lathe process engineers will build a burr-free toolpath and parameter set for your next batch.
FAQ
Can I use standard metal carbide inserts for PEEK turning?
Never. Standard neutral/negative rake metal inserts plow plastic and always create stretched burrs. High positive rake and zero edge hone are mandatory for clean polymer shearing.
Why does flood coolant make POM burrs worse?
POM softens at low heat. Flood cooling creates uneven thermal contraction, and melted plastic sticks to the cut edge. Compressed air dry turning delivers far cleaner edges with zero melted flash.
Is pre-annealing required for POM bar stock?
POM has low residual stress from extrusion. Pre-annealing is only needed for ultra-tolerance thin-walled sleeves. PEEK always needs pre-annealing to avoid both warpage and edge tearing during turning.
What is the best way to stop burrs on thin-walled PEEK bores?
Finish the internal bore first while the rod remains rigid, then turn the outer OD. Thin unsupported walls tear and create burrs if you machine OD first. Use small light finishing passes with air chip blowing.