Publisher: Zorapid.Ltd
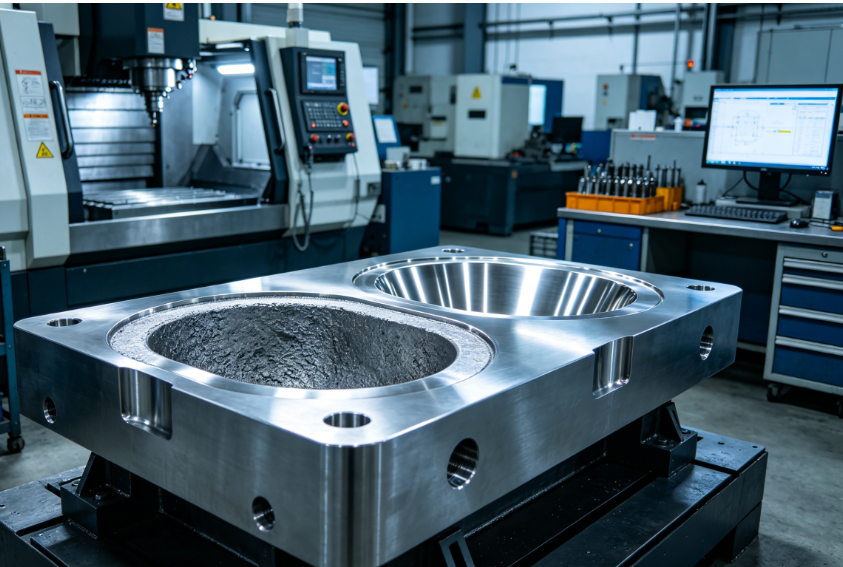
Deep closed cavities are one of the most frustrating jobs in CNC milling.
Long tool overhang creates violent chatter on vertical walls. Conventional layered roughing overloads the cutter in corners, bending the tool and leaving uneven stock.
Chips get trapped deep inside the pocket, recutting the surface and burning the cutting edge.
If you rush straight from roughing into finishing, variable stock thickness makes the tool deflect differently on every pass. You end up with tapered walls, wave marks and hours of extra bench polishing.
For hardened steel mold cavities, inconsistent stock also locks in residual stress, leading to post-machining warpage days later.
At Zorapid, we run deep cavity roughing and finishing daily on 3-axis and 5-axis hard milling cells for automotive and medical injection molds.
We have standardized a full two-stage workflow with strict CAM strategies, staged tooling, coolant rules and stock control.
Today we break down every proven best practice to stabilize roughing, equalize stock and deliver chatter-free high-precision finishing in deep cavities.
Split The Entire Job Into 3 Stages
You cannot jump directly from bulk roughing to final finishing. The correct sequence is non-negotiable for deep pockets:
- High-efficiency roughing: Remove bulk material with low constant cutter engagement, minimize tool load and heat buildup
- Semi-finish cleanup: Machine walls and floors to leave perfectly uniform stock all over the cavity
- Precision finishing: Run light low-deflection passes with consistent chip load for smooth walls and floors
Skipping the semi-finish step is the top reason for finish pass deflection and poor surface quality.
Best Practices for Deep Cavity Rough Milling
The goal of roughing is not just fast material removal — it is to keep cutter load constant, avoid corner overload and leave even stock so finishing runs smoothly.
Use Trochoidal / Adaptive Clearing Toolpaths (No Conventional Layer Milling)
Standard offset roughing slams the full tool diameter into inside corners. The sudden spike in radial load bends long-reach tools and triggers severe chatter.
Trochoidal adaptive paths solve this completely:
- Keep radial engagement limited to 5%~12% of tool diameter at all times
- The tool moves in small circular arcs instead of sharp corner turns
- Axial depth of cut can run full flute length without overload
- Cutting force stays consistent across the entire cavity, drastically reducing tool deflection
This strategy triples tool life on long overhang cutters and eliminates corner bending.
Progressive Staged Tooling (Short Rigid Tools First)
Never use one single long tool to rough the full cavity depth from top to bottom.
Follow this staged process:
- First pass: Shortest possible rigid end mill to machine the upper two-thirds of the cavity
- Second pass: Medium-length tool for the middle depth
- Third pass: Long-reach necked tool only for the remaining bottom section
Each stage reduces effective tool stick-out. Chatter risk drops sharply because you only extend the tool as deep as needed.
For every extra diameter of overhang, reduce feed rate by 8%~10% to maintain stable chip load.
Proper Entry & Chip Evacuation
- Always pre-drill a pilot hole before plunging into solid material. Helical ramp entry prevents high-impact tool shock
- Use neck-relieved long-reach tools to avoid rubbing against cavity sidewalls
- Run high-pressure through-spindle coolant. External flood cannot reach deep pocket bottoms, leading to trapped chips and thermal edge wear
- Program short retract moves periodically to lift the tool and flush swarf out of closed deep cavities
Roughing Stock Allowance Standard
Leave uniform semi-finish stock strictly controlled:
- Aluminum soft cavities: 0.15 ~ 0.2mm all over walls and floors
- Hardened steel HRC 48~54 mold cavities: 0.2 ~ 0.25mm consistent stock No thick leftover material on corners or deep pockets. Uneven stock is the biggest enemy of stable finishing.
Semi-Finish Milling — The Most Overlooked Critical Step
Most programmers skip semi-finishing and jump straight into finishing. This creates variable cutting depth, tool deflection and inconsistent wall geometry.
Semi-Finish Core Objectives
- Clean up uneven roughing stock from corners and deep floors
- Machine all vertical walls and bottom surfaces to leave perfectly equal finishing allowance everywhere
- Remove step lines left by layered roughing to eliminate sudden jumps in tool load during finishing
Recommended Semi-Finish CAM Strategies
- Z-level contour wall passes: Machine vertical cavity walls layer by layer to equalize stock thickness
- Rest milling cleanup: Run small diameter tools to remove leftover material in tight inner corners where the main roughing tool could not reach
- Floor cleanup flat mill passes: Level the cavity bottom so the ball nose finishing tool always cuts with identical light chip load
After semi-finishing, run a quick on-machine probe check to verify stock thickness is consistent within ±0.03mm across the entire pocket.
Best Practices for Deep Cavity Finish Milling
Finishing deep cavities has two main targets: eliminate tool vibration and maintain uniform scallop height for consistent surface finish.
Tool & Holder Rigidity Is Non-Negotiable
- Use shrink-fit or hydraulic chucks, never standard ER collets, to keep runout below 0.003mm
- Use variable-pitch flute ball end mills to break resonance and suppress chatter on deep vertical walls
- Keep tool stick-out as short as possible; tilt the spindle on 5-axis machines to cut with stubby rigid tools instead of long extended cutters
- For overhang exceeding 6×D, use anti-vibration damped tool holders to stop wave marks on deep contoured walls
Split Finishing Into Wall Passes + Floor Passes (Do Not Mix Them)
- Vertical wall finishing: Use Z-level climb milling only. Never switch between climb and conventional cutting. Add a small spring pass after contouring to remove tool deflection spring-back and keep walls perfectly straight.
- 3D curved floor finishing: Enable constant scallop height spiral toolpaths. The CAM software automatically adjusts stepover based on surface slope, so residual texture stays identical on flat areas and steep curved slopes. Fixed stepover raster paths create uneven coarse scallops on steep walls.
Cutting Mode & Parameters For Hardened Steel Cavities
- Strict climb down-milling only. Conventional up-cutting creates edge tearing and surface work hardening
- Keep finishing depth of cut ultra-light: 0.05~0.12mm per Z step
- Maintain low radial stepover to lock scallop height below 0.003mm for Ra 0.2~0.4μm as-machined surface
- Pause the program periodically to let the long tool cool and release thermal expansion drift
Corner Finishing Trick
Sharp inner corners always suffer extra spark-out and rounding.
Reduce spindle feed rate slightly when the tool approaches 90° corners, and add small arc lead-in/out moves to avoid dwell marks and over-erosion.
6 Common Deep Cavity Milling Defects & Quick Fixes
| Defect | Root Cause | Immediate Correction |
|---|---|---|
| Wave chatter ripples on deep vertical walls | Long tool overhang + fixed-pitch flute resonance | Switch to variable-pitch ball mill; use shrink-fit holder; adopt 5-axis short-tool tilting |
| Tapered walls (wider top, narrow bottom) | Variable stock causing tool deflection during finishing | Add semi-finish pass to equalize stock thickness; run final spring contour pass |
| Trapped chips burn tool tip and scratch cavity floor | External flood coolant cannot reach deep pockets | Upgrade to high-pressure through-spindle internal coolant with periodic chip-clearing retracts |
| Uneven coarse texture on curved cavity floors | Fixed stepover raster finishing | Enable constant scallop height spiral 3D finishing |
| Corner leftover stock requires manual bench work | Main roughing tool cannot reach small inner radii | Add rest milling semi-finish passes with smaller diameter cleanup tools |
| Post-machining cavity warpage | Uneven roughing stock locking residual stress | Balance material removal evenly; leave uniform stock and split light finishing passes |
Zorapid Full Deep Cavity Rough + Finish Standard Workflow
Copy this SOP for stable mold cavity production with minimal polishing:
- Pre-program pilot hole entry; use trochoidal adaptive roughing with low radial engagement
- Machine the cavity in progressive stages with short → medium → long staged tooling to minimize overhang
- Leave 0.2mm uniform stock on all walls and floors after roughing
- Run Z-level semi-finish wall contour + rest corner cleanup + floor leveling passes
- Verify consistent stock thickness with on-machine probing
- Mount variable-pitch ball mill in shrink-fit low-runout holder
- Split finishing: Z-level climb milling for vertical walls + constant scallop spiral finishing for curved floors
- Add spring contour pass to eliminate wall taper from tool deflection
- Use through-spindle high-pressure coolant throughout the full process
- Let the part cool fully while clamped before final inspection
Measurable Production Result:
Old single-tool rough + finish process: Heavy chatter, uneven stock, 6~8 hours manual polishing, wall straightness error up to 0.012mm
Optimized 3-stage workflow: Vibration-free cutting, consistent Ra 0.3μm CNC surface, polishing labor reduced by 75%, wall straightness held within 0.004mm.
Real EU Client Case Study
A German mold manufacturer ordered a deep HRC52 S136 cavity with 110mm depth and narrow inner corners.
Their original 3-axis process had two major quality issues:
- Long single long-reach tool created severe chatter waves on vertical walls
- Uneven roughing stock caused heavy tool deflection, leaving tapered walls and deep corner leftover material
We revised the full roughing and finishing process following our best practices:
- Switched conventional layered roughing to trochoidal adaptive low-engagement toolpaths
- Split machining into three staged short-to-long tooling passes to cut effective tool overhang
- Added a full semi-finish milling stage to equalize stock across walls, floors and corners
- Used variable-pitch ball mills with shrink-fit holders, split wall Z-contour and constant scallop spiral floor finishing
- Added a final spring pass to remove wall taper caused by cutter deflection
Final outcome:
Zero chatter marks on deep vertical walls. Walls stayed perfectly straight with no taper.
Inner corners were fully cleaned without manual bench work, and the as-machined surface only required light buffing before polishing. Total mold lead time was shortened by three full days.
Conclusion
Successful deep cavity milling does not depend only on expensive long-reach anti-vibration tools.
Stable low-deflection results come from following six linked best practices across roughing and finishing:
- Use trochoidal adaptive roughing to keep cutter load constant and avoid corner overload
- Adopt progressive staged short-to-long tooling to minimize effective tool overhang and suppress chatter
- Run a dedicated semi-finish stage to equalize stock thickness everywhere before finishing
- Split finishing into vertical wall Z-level climb milling and constant scallop spiral 3D floor finishing
- Use shrink-fit rigid holders and variable-pitch tooling to eliminate resonance vibration
- Maintain high-pressure through-spindle coolant to flush trapped chips out of closed deep pockets
When you control tool load, stock uniformity and tool rigidity step by step, you eliminate wall taper, chatter ripples and corner leftover material all at once.
At Zorapid, we specialize in deep hardened steel mold cavity roughing and high-precision hard milling finishing for automotive, medical and consumer injection molds across Europe and North America.
If you keep fighting vibration, uneven stock and poor surface quality on deep pockets, send your cavity depth, material and CAM file. Our CNC programmers will build a complete roughing + semi-finish + finishing toolpath and tooling plan for your next mold project.
FAQ
Is trochoidal roughing always better than conventional offset roughing for deep cavities?
Yes for long-reach deep pockets. It keeps radial engagement low and avoids sudden corner overload that bends long tools. Conventional roughing only works for shallow open pockets with short rigid cutters.
Why do I still get tapered walls even with good finishing parameters?
Uneven leftover roughing stock causes variable tool deflection. The semi-finish pass evens out stock thickness, and a final spring contour pass removes spring-back deflection after the main wall cut.
What is the difference between constant scallop height and fixed stepover finishing?
Fixed stepover creates wide coarse scallops on steep curved walls. Constant scallop automatically adjusts step distance so surface texture remains uniform on flat floors and steep vertical contours.
Can I skip semi-finishing if I run lighter roughing passes?
Not reliably. Layered roughing always leaves step lines and variable stock in corners. The semi-finish stage levels the stock so the finishing tool runs with identical light chip load on every segment. Skipping it always leads to inconsistent deflection and surface quality.