Published:Zorapid.Ltd
Every sheet metal hardware project falls into one of two manufacturing buckets: custom sheet metal fabrication or progressive stamping. The biggest mistake engineers make is picking the wrong process based on part shape alone — batch volume is the single biggest factor that controls cost, lead time and quality consistency.
- Custom fabrication uses laser cutting, CNC bending, TIG welding and manual hardware insertion. No hard tooling required, perfect for low runs and frequent design changes.
- Stamping relies on custom progressive steel dies that blank, bend, coin and form parts in one fast press cycle. Huge upfront tool cost, ultra-low per-unit price at high volumes.
Many OEMs waste thousands by stamping early prototypes (wasting die fees) or running thousands of mass parts via slow fabrication (blowing per-unit cost). This batch-focused guide breaks down clear volume thresholds, design rules, hidden fees and real-world tradeoffs so you can lock in the right process before sending RFQs. All data comes from Zorapid’s combined fabrication and stamping production lines for consumer, medical, automotive and semiconductor enclosures.
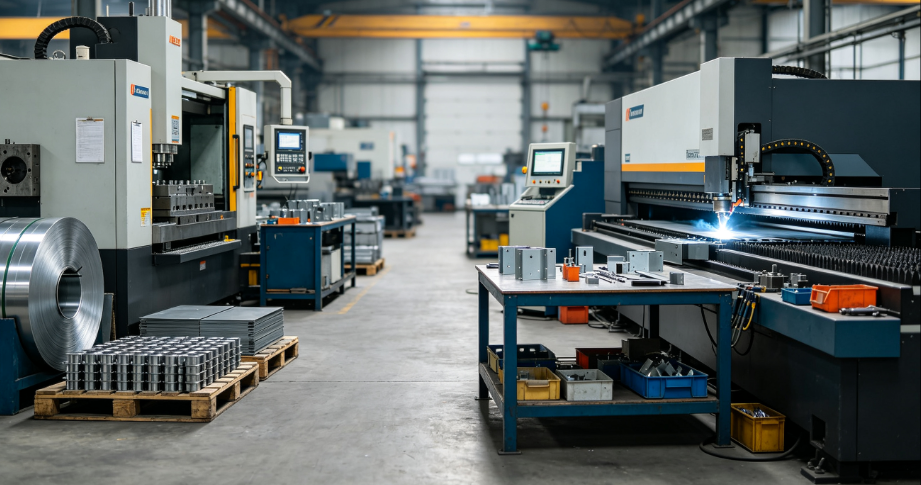
Quick Core Definition: Stamping vs Custom Sheet Metal Fabrication
Custom Sheet Metal Fabrication
Also called rapid sheet metal prototyping / CNC sheet metal manufacturing.
Workflow: Raw sheet stock → fiber laser blanking → CNC press brake bending → manual welding / hardware insertion → deburring & finishing.
No dedicated hard tooling; every part is programmed digitally. Geometry changes only require CAD edits, no die rework.
Progressive Stamping
High-speed mass production process built around a custom multi-stage steel die mounted on a stamping press.
Workflow: Coil metal feed → die blanks, bends, pierces, forms in one continuous stroke → automatic part ejection.
All forming geometry is locked into the die; any design modification requires costly die rework or new tooling.
Batch Volume Breakdown & Decision Thresholds
This tiered volume split is the golden rule our engineers use for every sheet metal quotation:
1–50 Units: Custom Fabrication Is Always The Default
Why stamping is not viable here
Stamping requires custom die design, CNC die machining, heat treatment and trial runs. Tooling setup fees far outweigh per-part savings for small batches. Even simple brackets carry $1,500–$8,000 die costs that cannot be amortized across under 50 pieces.
Fabrication advantages for small batches
- Zero upfront tooling cost
- Fast turnaround (3–7 business days including finishing)
- Easy CAD revisions mid-order for design validation
- Ideal use cases: NPI prototypes, lab test fixtures, clinical trial hardware, custom low-volume equipment housings
50–500 Units: Cross-Over Zone — Side-by-Side Cost & Lead Time Tradeoffs
This gray zone requires a direct quote comparison to decide.
- Fabrication pros: No die investment, design edits allowed, faster launch timeline
- Stamping pros: Lower per-unit cost as quantity climbs, more consistent surface finish, fully automated repeatability
Typical cross-over tipping point for simple flat brackets: ~200 units. Complex multi-bend welded enclosures usually break even at 300–500 units due to higher die manufacturing costs.
Key note: If your design is still undergoing tweaks, always stick with fabrication until CAD is fully frozen. Die rework in this volume range erases all per-unit cost savings.
500+ Mass Batches: Progressive Stamping Becomes Economical
Once orders exceed 500 identical, frozen-design parts, stamping delivers clear financial benefits:
- Per-unit cost drops drastically (40–70% cheaper than fabrication at 1,000+ pcs)
- Fully automated high-speed press output (thousands of parts per hour)
- Tighter repeatable dimensional consistency across millions of units
- Minimal manual labor, fewer human errors on high-volume runs
Best for: Consumer electronics housings, automotive sheet metal brackets, standard semiconductor connector shields, mass-market equipment chassis.
Full Head-To-Head Comparison (Stamping vs Custom Fabrication)
| Evaluation Metric | Custom Sheet Metal Fabrication | Progressive Stamping |
|---|---|---|
| Upfront Tooling Cost | $0 | $1,500 – $15,000 die investment |
| Per-Part Unit Cost (1–50 pcs) | Low | Very high (tool overhead spread thin) |
| Per-Part Unit Cost (1,000+ pcs) | High | Extremely low |
| Standard Lead Time (1–50 pcs) | 3–7 days | 14–30 days (die design + build + trial) |
| Standard Lead Time (1,000+ pcs) | 10–20 days batch run | 5–8 days post die validation |
| Design Change Flexibility | Excellent (only CAD edits needed) | Poor (die rework costs + 3–7 day delays) |
| Dimensional Repeatability | Good (operator-dependent bending) | Excellent (fully automated die forming) |
| Complex Welded Assemblies | Simple to produce in-house | Requires secondary welding station after stamping |
| Minimum Bend Radii / Micro Features | Flexible via laser & CNC brake | Limited to die machinable geometry |
| Surface Burr Control | Manual ultrasonic deburring | In-die fine blanking for burr-free edges |
| Ideal Batch Range | 1–500 units, evolving designs | 500+ frozen design mass production |
| Best Use Case | Prototypes, NPI, pilot runs, custom one-off hardware | Mass consumer, automotive, OEM standard components |
Key Design Limitations For Each Process
Custom Fabrication Design Rules
Fabrication has almost no hard geometric locks, only practical CNC brake limits:
- Minimum bend radius matches sheet thickness standard industry values
- Holes must maintain minimum clearance from bend lines to avoid tearing
- Deep offset forms require multiple brake setups (adds minor cost)
- Welded multi-piece enclosures are fully supported without extra tooling
- Thin gauges (0.1mm–3mm aluminum, stainless, cold rolled steel) all processable
No design is unfabricable — even complex custom cutouts, asymmetrical shapes and mixed bend angles work with digital programming.
Stamped Part Design Restrictions
All geometry must be machinable into solid steel dies, creating strict hard rules:
- Symmetrical geometry preferred to balance die cutting forces
- Minimum feature size limited by die punch strength; ultra-micro slots increase die wear
- Deep sharp draws / tall offsets require multi-stage die stations, raising tool cost
- Welded multi-component assemblies cannot be stamped in one cycle; secondary assembly labor required
- Drastic design overhauls demand full die rebuilds, not simple edits
- Uniform wall thickness mandatory; uneven gauges create uneven stamping forming stress
Zorapid’s End-To-End Dual Workflow For All Batch Sizes
We operate separate dedicated fabrication and stamping production lines under one roof, enabling seamless transition from prototype to mass production without switching suppliers.
Custom Fabrication NPI / Small Batch Workflow
- CAD DFM review for laser cutting, bend clearance and weld optimization
- Fiber laser blank nesting to minimize raw material waste
- CNC press brake bending with springback compensation for consistent angles
- TIG / spot welding, PEM hardware insertion, manual assembly
- In-house finishing: brushing, anodizing, powder coating, passivation
- Full dimensional QA inspection and batch packaging Turnaround: 3–7 business days for 1–50 unit prototype batches.
Progressive Stamping Mass Production Workflow
- Stamping-specific DFM to simplify die construction, reduce tool wear
- 2D die layout design, multi-stage blank, pierce, bend, coin stations
- CNC machining & heat treatment of hardened progressive steel die
- First article stamping trial run, dimensional adjustment and die fine-tuning
- High-speed coil-fed automated stamping press mass production
- In-line deburring, batch finishing and full CMM inspection Once die is validated, reorders launch in 5–8 days with zero repeat tooling fees.
Real Client Case: Electronics Enclosure Batch Transition From Fabrication To Stamping
A consumer IoT hardware OEM needed aluminum device enclosures for their new product line.
Phase 1: NPI Pilot Batch (40 units)
Volume: 40 prototype enclosures for lab testing and design clinics
Process chosen: Custom sheet metal fabrication
Rationale: 3 planned CAD revisions to adjust internal rib cutouts and mounting bosses; stamping die would require costly rework after each design tweak.
Outcome: 5-day turnaround, free DFM edits, zero tooling cost, all fit tests passed.
Phase 2: Pre-Production Pilot (350 units)
Volume: 350 pre-production units for beta customer trials
Process comparison: Fabrication vs stamping quote cross-over analysis
- Fabrication: Fast launch, higher per-unit cost, design still subject to minor tweaks
- Stamping: Large upfront die fee, 28-day lead time for die build Decision: Stick with fabrication until design fully locked.
Phase 3: Mass Launch (12,000 units per year)
Volume: Monthly runs of 1,000+ identical frozen-design enclosures
Process switch: Progressive stamping
Rationale: Amortized die tooling cut per-unit cost by 62% vs fabrication, consistent repeatability for automated assembly lines.
Outcome: Annual hardware material spend reduced by over $24,000, stable 6-day mass batch lead times.
Cost Saving Tips For Every Batch Tier
Small Batch (1–50 pcs) Fabrication Savings
- Lock CAD fully before ordering to avoid re-laser cutting blanks
- Standardize bend radii and hole sizes to skip custom tool surcharges
- Delay cosmetic coating until final design validation; test raw brushed metal first
- Consolidate multiple related bracket parts into one single order to split setup labor
Cross-Over Batch (50–500 pcs) Cost Hacks
- Run fabrication first to fully freeze geometry before investing in stamping dies
- Request dual fabrication / stamping side-by-side quotes to compare total landed cost
- Simplify complex multi-weld assemblies if planning to stamp later to cut die complexity
Mass Batch (500+ pcs) Stamping Savings
- Optimize DFM for stamping symmetry and minimal die stations to lower initial tool price
- Order larger bulk coil stock to reduce raw material per-unit pricing
- Lock multi-month volume contracts to qualify for tiered stamping production discounts
- Add in-die fine blanking to eliminate separate deburring labor costs
Common Sourcing Mistakes & How To Avoid Them
- Mistake: Invest in stamping dies for early evolving prototypes Fix: Only commit to die fabrication once your CAD is fully frozen with no planned geometry changes.
- Mistake: Run thousands of mass parts via custom fabrication to skip die fees Fix: Calculate total landed cost (per unit × quantity) — high volume fabrication labor costs will far exceed one-time die investment.
- Mistake: Assume stamping works for complex welded multi-piece assemblies Fix: Stamping produces single-piece blanks; multi-part welded chassis always need secondary assembly labor.
- Mistake: Skip stamping-focused DFM before die design Fix: Poor geometry adds extra die stations, inflating tool cost and extending die build lead time by weeks.
- Mistake: Switch suppliers between prototype fabrication and mass stamping Fix: Partner with a full-service shop like Zorapid that offers both workflows to reuse validated design DFM data without re-qualification.
FAQ
What is the exact break-even quantity where stamping becomes cheaper than fabrication?
Simple single-bend brackets break even around 150–200 units. Complex welded multi-panel enclosures cross over at 300–500 units, driven by higher die manufacturing costs for complex forming stations.
Can I modify stamped part geometry after the die is built?
Minor adjustments (small hole size changes, shallow bend tweaks) are possible via low-cost die tweaks. Major redesigns (new cutouts, deep offset forms) require a full new die with full original tooling fees.
Does Zorapid offer both custom fabrication and progressive stamping under one roof?
Yes. We maintain separate laser/fabrication cells and high-speed stamping press lines, enabling seamless transition from small NPI batches to mass production without third-party outsourcing.
Is stamping always higher repeatability than custom fabrication?
Yes. CNC bending relies on manual part repositioning that creates minor angular variation between batches. Stamping dies form every part with identical pressure and positioning for perfect dimensional consistency.
For cleanroom semiconductor shield parts, which process delivers lower micro burr risk?
Mass batches use fine-blanking progressive stamping for burr-free edges. Small prototype batches use ultrasonic micro deburring in our fabrication line to eliminate contamination-causing slivers.
Wrap-Up
The core rule to simplify sheet metal sourcing is simple: judge your process by batch size and design maturity, not just part shape.
- Low-volume evolving prototypes: Custom fabrication eliminates risky die investment and speeds up NPI testing
- Frozen high-volume mass production: Progressive stamping slashes long-term per-unit costs and boosts batch consistency
- Cross-over 50–500 unit runs: Always request dual-process quotes to compare total landed cost before committing.
As a full-service sheet metal manufacturer with both fabrication and progressive stamping capabilities, Zorapid removes the supplier switching hassle for your entire product lifecycle. Our engineering team provides batch-specific DFM optimization, transparent dual-process pricing, and consistent in-house finishing and QA whether you order 5 prototype brackets or 10,000 stamped chassis.
Request Your Free Batch DFM Review & Dual Process Quote
Share your sheet metal CAD files, target batch quantity, material and finishing specs. Our team will analyze whether custom fabrication or stamping fits your volume, deliver a full DFM report, and provide side-by-side cost and lead time breakdowns for both manufacturing workflows.