Published by: Zorapid.Ltd
Most hardened steel mold jobs run into two costly roadblocks.
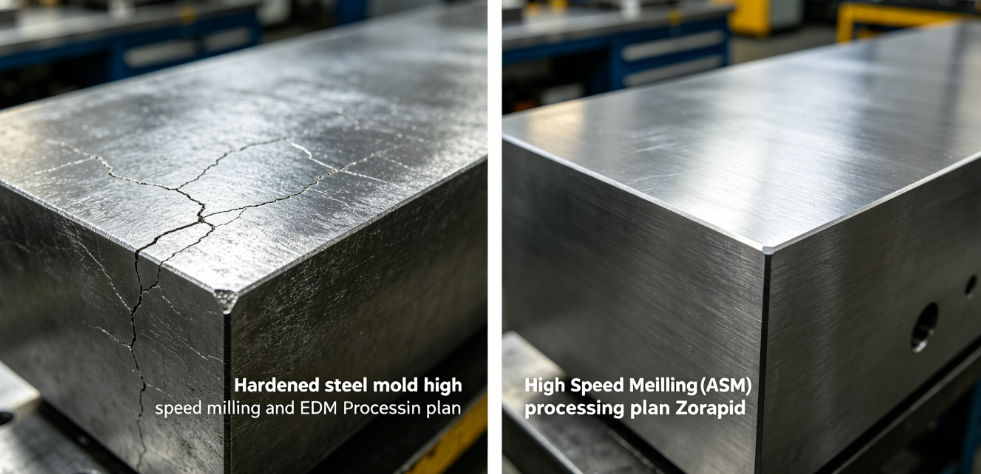
First, you rough mill soft steel, heat treat, then jump straight into sinker EDM. You end up with thick recast layers, microcracks and 20+ hours of hand polishing.
Second, you waste weeks building dozens of graphite electrodes just to mill simple cavity walls that a high-speed mill could finish cleanly.
At Zorapid, we build every hardened mold with a strict hybrid workflow: high-speed hard milling first, EDM only for unreachable sharp corners and deep narrow ribs.
This balanced plan cuts EDM runtime by 65%, removes surface thermal damage, slashes polishing time and holds ±0.005mm dimensional stability on HRC 48–54 S136, NAK80 and H13 mold steel.
Today we share our fully proven step-by-step processing plan, including toolpaths, stock allowance, electrode scheduling and distortion control — no textbook theory, only workshop-ready procedures.
Why HSM + EDM Hybrid Beats Full EDM Or Full Hard Milling
Let’s break down the strengths and limits of each process for hardened mold steel:
High Speed Milling (HSM Hard Milling)
- Runs at 18,000–36,000 RPM with solid carbide AlTiN end mills
- Removes material via clean shearing with zero spark erosion
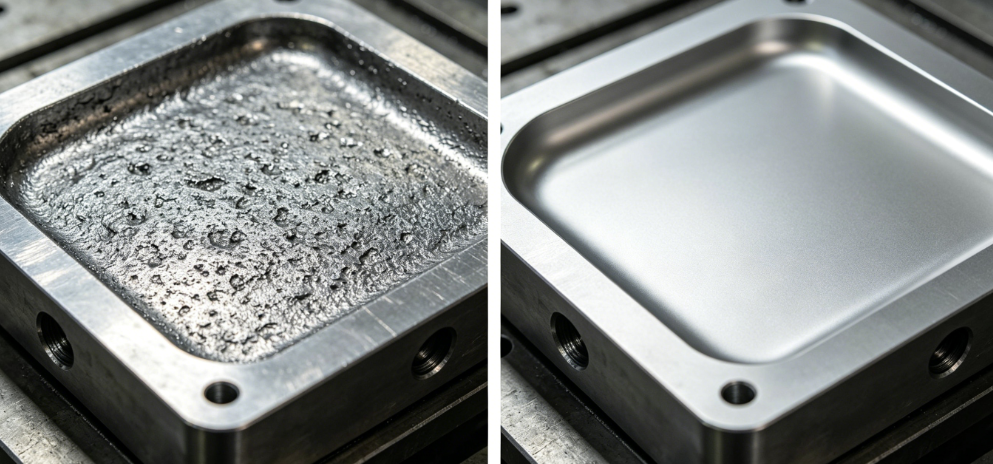
- Delivers Ra ≤ 0.4μm surface finish with no recast layer or thermal stress
- Fast for open cavities, flat surfaces, side walls and shallow pockets
- Weak point: Cannot reach sharp inner corners smaller than tool radius, deep narrow ribs or blind thin slots
Sinker EDM
- Sparks vaporize metal regardless of workpiece hardness
- Creates crisp zero-radius internal corners and ultra-fine deep rib details
- No cutting force, so thin-walled mold sections stay distortion-free
- Weak point: Slow material removal, forms brittle recast white layer, leads to long manual polishing and shorter mold service life
Our core rule for all hardened mold inserts:
Mill everything reachable with HSM first. Reserve EDM only for corners, deep ribs and narrow slots that no cutter can touch.
Never run full cavity EDM after heat treatment — that’s where cost and surface defects spiral out of control.
Zorapid Step-by-Step Full Processing Plan
We lock this 7-stage sequence into every hardened core and cavity job to control distortion, tool wear and EDM workload.
1: Soft State Rough Machining (Pre-Heat Treatment)
- Machine bulk stock out on a standard 3-axis VMC, leave uniform 0.4–0.6mm stock on all cavity walls and shut-off surfaces
- Drill all cooling channels, ejector pin holes and wire EDM start holes before hardening
- Add generous relief on sharp corners to avoid heat treatment stress cracking
- Stress-relieve the steel block to cut post-quench warpage below 0.008mm
Key note: Uneven stock creates uneven quenching distortion. We maintain consistent stock all over the part before vacuum hardening.
2: Vacuum Heat Treatment & Stabilization
- Vacuum quench + temper twice to hit target hardness:
- S136 / STAVAX: HRC 50–54
- NAK80: HRC 48–52
- H13 hot work steel: HRC 49–53
- Air cool slowly, no rapid water quenching that warps mold plates
- Inspect flatness and correct minor warpage before hard milling begins
3: High Speed Hard Milling (Semi-Finish + Finish — Core Cost Saver)
This is the most critical stage to cut EDM workload.
- Machine on high-speed machine with 24,000+ RPM spindle, shrink-fit tool holders (runout <0.002mm)
- Toolpath strategy strictly uses trochoidal dynamic milling to keep radial cut only 5–10% of tool diameter
- Semi-finishing pass: leave 0.08–0.12mm uniform stock exclusively for EDM corners only
- Finishing pass machines all open walls, flat surfaces and curved contours down to nominal size
- Use climb milling only; light cuts with air blast cooling to prevent thermal softening of cutting edges
- No coolant flood — thermal shock will crack carbide tools on hardened steel
Tooling standard we follow: Variable helix AlTiN coated solid carbide end mills with honed cutting edges to fight chatter and edge chipping.
4: Reserve EDM Stock Only For Unmachinable Features
We strictly limit EDM work to these features only:
- Internal sharp corners R < 0.15mm (smaller than any available end mill)
- Deep narrow ribs with depth-to-width ratio over 6:1
- Blind thin slots and tiny engraved text
- Deep closed cavities where tool reach is blocked
All remaining cavity geometry stays fully milled with HSM. This cuts graphite electrode production from 6–8 sets down to 1–2 sets per mold insert.
5: Sinker EDM Machining (Low-Energy Spark To Avoid Recast Layer)
Most mold shops run high-current rough sparks and create a thick white recast layer. Our controlled EDM procedure:
- Split EDM into 3 passes: rough spark → semi-finish → ultra-fine finish spark
- Lower pulse energy for finishing runs to limit recast thickness below 0.003mm
- Use copper electrodes for fine corners, graphite only for large rough erosion
- Maintain strong dielectric flushing to flush spark debris and prevent secondary arcing
- Never leave EDM finish stock thicker than 0.03mm after HSM pre-machining
Result: No brittle surface layer, so the mold runs 2–3 million injection shots without edge chipping.
6: Post-EDM Light Cleaning & Stress Relief
We run a 2-hour low-temperature temper after EDM to remove spark-induced surface stress.
This eliminates tiny microcracks that cause early failure on high-cycle injection molds.
7: Final Polishing
Since 95% of the cavity is HSM milled to Ra 0.3–0.4μm, polishing work drops from 25 hours down to just 4–6 hours per cavity.
No heavy grinding to remove EDM pitting and recast material.
Stock Allowance Matrix (Critical For Zero Distortion & Clean Edges)
| Process Step | Stock Left On Cavity Walls | Stock Left On EDM Corner Zones |
|---|---|---|
| Soft Roughing (Pre-HT) | 0.40 ~ 0.60 mm | 0.50 ~ 0.70 mm |
| Post-HT HSM Semi-Finish | 0.08 ~ 0.12 mm (fully milled area) | Reserved fully for EDM |
| HSM Finishing Pass | Zero stock, finished to print size | 0.02 ~ 0.03 mm EDM finish allowance |
| Sinker EDM Ultra-Fine Spark | N/A | Zero remaining stock |
Common mistake we fix for customers: Leaving 0.2mm+ stock for EDM over the entire cavity. This forces hours of spark erosion and creates heavy surface damage.
Cost & Lead Time Gap: Full EDM vs HSM + Limited EDM Hybrid
Test part: S136 hardened mold core, batch of 2 inserts, HRC 52.
| Production Item | Full Cavity Sinker EDM Workflow | HSM Hard Milling + Limited Corner EDM |
|---|---|---|
| Number of Graphite Electrodes | 7 sets | Only 2 small corner electrodes |
| Total EDM Runtime | 28 hours | 8 hours |
| Manual Polishing Hours | 24 hours | 5 hours |
| Recast Layer & Microcrack Risk | High | Minimal (<3μm recast) |
| Total Machining Lead Time | 10 working days | 4 working days |
| Total Processing Cost Per Insert | $1,640 | $895 |
Clear outcome: The HSM-first hybrid plan cuts total cost by 45% and compresses lead time by 60%, while drastically improving mold surface integrity and service life.
Three Common Mold Failures & How Our Process Eliminates Them
1: EDM recast layer causes early corner chipping
Fix: Mill 95% of the cavity with HSM. Use low-energy fine spark only on sharp corners, limit recast layer under 3μm. No brittle white layer left on shut-off edges.
2: Heat treatment distortion ruins dimensional tolerance
Fix: Uniform pre-HT stock + double temper + low-stress HSM light cuts. We hold total part warpage under 0.008mm on large mold blocks.
3: Too many electrodes stretch lead time and blow budget
Fix: Remove all open-wall EDM work entirely. Only machine unreachable corners with sinker EDM, cutting electrode machining work by over 70%.
Real Zorapid Mold Insert Case Study
Project Background
Medical syringe mold core, S136 vacuum hardened to HRC 50–52, SPI A-2 mirror polish requirement, sharp inner corner R0.08mm, tight shut-off flatness ±0.005mm.
Old Process (Full EDM After Heat Treatment)
- 6 graphite electrodes, 32 hours sinker EDM
- Thick recast layer on sealing edges
- 22 hours hand polishing, still had micro-pitting on the cavity surface
- Lead time: 11 days
Optimized HSM + Limited EDM Plan
- Soft roughing + stress relief before vacuum hardening
- HSM high-speed hard milling finished all open cavity surfaces
- Only 2 small copper electrodes for the tiny sharp corners
- Low-energy fine spark with minimal recast
- Polishing time cut down to 5 hours
Final Result
- Zero surface microcracks, perfect SPI mirror finish
- All GD&T flatness and position tolerance passed CMM inspection
- Lead time shortened to 4 days, total cost reduced by 47%
- The mold ran 1.3 million molding shots without core edge damage
Material Matching For This HSM + EDM Workflow
We apply this exact processing plan for all common hardened mold steels:
- S136 / STAVAX (HRC 48–54): Medical & optical molds; HSM finishing + low-energy corner EDM
- NAK80 (HRC 48–52): Consumer plastic molds; minimal EDM, mostly full hard milling
- H13 (HRC 49–53): High-temperature die casting molds; trochoidal HSM to fight tool wear
- D2 (HRC 58–62): Stamping die inserts; limit EDM strictly to narrow slots only
Quick Implementation Checklist For Your Next Hardened Mold Job
First: Soft rough + stress relief + vacuum double temper to control warpage
Do Second: High-speed hard milling for all open walls, flats and curved contours
Third: Leave only sharp corners & deep ribs for sinker EDM
Do Fourth: Use low-energy finishing spark to keep recast layer ultra-thin
Last: Short polishing on clean milled surfaces only
Full cavity sinker EDM on large mold surfaces
Heavy rough spark that creates thick brittle white layers
Uneven stock before heat treatment (the #1 cause of mold distortion)
Why Zorapid Delivers Stable HSM + EDM Mold Processing
- In-house high-speed milling centers + sinker EDM machines, fully controlled one-stop workflow
- VERICUT simulation pre-checks all hard milling toolpaths to avoid gouging and extra EDM stock
- We strictly separate HSM open-surface work from EDM corner work to cut electrode cost
- All hardened steel blocks go through vacuum heat treatment with documented hardness reports
- We control recast layer thickness and surface stress to extend mold cycle life
- First-pass yield on hardened mold core & cavity inserts stays above 98% for European and US medical & automotive mold projects
Conclusion
Hardened steel mold processing no longer means hours and hours of full sinker EDM followed by endless hand polishing.
The optimal plan is clear: Use high-speed hard milling to machine nearly all cavity geometry cleanly with zero thermal damage, then limit EDM exclusively to tiny sharp corners and deep ribs no cutter can reach.
This HSM + limited EDM hybrid workflow slashes electrode cost, shortens lead time by more than half, eliminates recast layer microcracks, and holds tight dimensional stability on HRC 48–54 mold steel.
When you send your core and cavity STEP files to Zorapid, we will build a full process sheet: HSM toolpaths, stock allowance, electrode layout and EDM parameter settings. We lock down distortion and surface quality before the first cut starts.
Submit your mold insert drawing for a customized HSM + EDM processing plan today.
FAQ
Can high-speed milling replace most sinker EDM work on hardened molds?
Yes. All open cavities, side walls and curved surfaces can be hard milled after heat treatment. We only keep EDM for inner sharp corners and deep narrow ribs, cutting EDM workload by 60–70%.
How do I stop EDM recast layers on hardened S136 mold steel?
Pre-mill 95% of the mold with HSM to minimize spark time, then run multi-stage low-current fine EDM sparks with strong flushing. Keep recast thickness under 3μm to avoid microcracks.
What stock allowance should I leave between HSM hard milling and sinker EDM?
Leave only 0.02–0.03mm finishing stock on EDM features. Any extra material will force long spark erosion and create surface thermal damage.
Does hard milling after heat treatment cause mold distortion?
No, if you use light radial trochoidal cuts and low cutting force. Pre-HT stress relief plus small HSM passes keeps total part warpage under 0.01mm for most mold inserts.
Do I need dozens of graphite electrodes if I use HSM first?
Absolutely not. Most open cavity areas get fully milled. You only need 1–2 small electrodes for corner details, eliminating most graphite machining cost.