Published:Zorapid.Ltd
If you work with injection molding, you already know a hard truth:
Cooling time makes up 60%–80% of your total molding cycle.
Many teams spend countless hours tweaking injection speed, hold pressure and melt temperature to boost productivity, yet overlook mold cooling. Poor cooling leads to two expensive headaches: unnecessarily long cycle times and unpredictable part warpage.
Uneven cooling creates differential shrinkage across the plastic component. Internal residual stress builds up, and once the part ejects, it twists, bows or distorts. The result: dimensional drift, assembly fit issues, high scrap rates and delayed production schedules.
Well-engineered mold cooling solves both problems at once. Faster, uniform cooling shortens cycle time while balancing shrinkage to control warpage. In this guide, we break down actionable cooling design rules, common mistakes to avoid, and how Zorapid implements advanced cooling strategies for industrial plastic components.
Why Mold Cooling Is So Critical For Injection Molding
Plastic melts at high temperature inside the barrel. After filling and packing, the material must lose enough heat to solidify before ejection.
- If cooling is insufficient: Parts are soft when ejected, deform easily, sink marks and warpage spike.
- If cooling is inefficient: You extend hold/cool time, raising per-unit production cost.
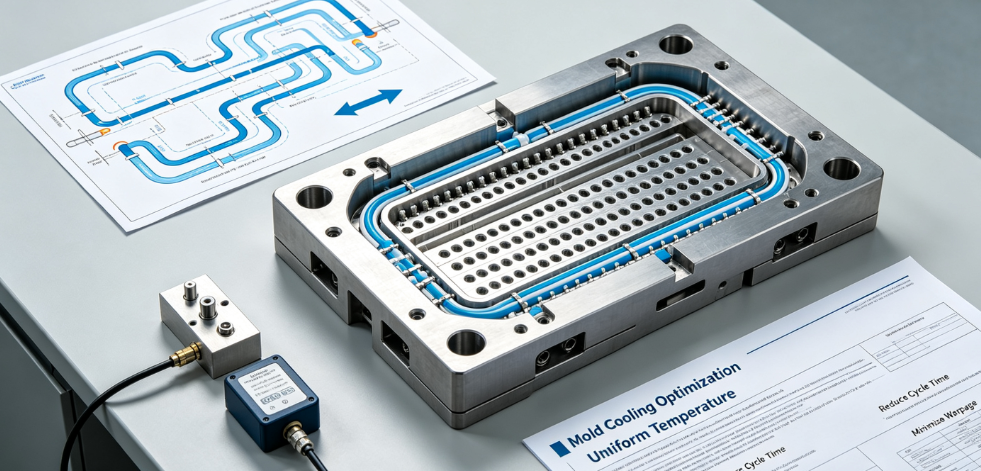
Conventional straight-drilled cooling channels work for simple parts. But for enclosures, thin-wall components, deep ribs and contoured geometry, standard layouts struggle to deliver consistent temperature across the mold surface. Hot spots are the main source of uneven shrinkage and warpage.
Core Principles for Effective Mold Cooling Design
Keep these four fundamentals front of mind during mold design:
- Uniform temperature distribution across all mold surfaces No isolated hot zones. The goal is to match cooling rate on opposite sides of every wall section.
- Maintain consistent distance from cooling channels to mold cavity Channel distance directly impacts heat transfer. Too far = slow cooling; too close = risk of mold surface temperature variation and premature mold wear.
- Sufficient turbulent coolant flow Laminated water flow only cools the channel wall. Turbulent flow maximizes heat exchange. Oversized or undersized circuits break turbulence.
- Balanced coolant circuit resistance Parallel circuits with unequal flow create temperature differences. Poor balancing leads to inconsistent cooling across the mold.
Practical Strategies to Optimize Mold Cooling
1. Position Cooling Channels Correctly
Standard guideline:
- Distance from channel centerline to cavity surface: 1.5× ~ 2× channel diameter
- Space between adjacent cooling channels: 3× channel diameter
Avoid placing channels too close to sharp corners. Corners naturally trap heat and need extra cooling attention. For deep bosses and tall ribs, standard drilling cannot reach the core tip — this is where hotspots frequently appear.
2. Use Baffles, Bubblers and Heat Pins for Deep Cores & Ribs
Tall internal cores, standoffs and mounting bosses are notoriously hard to cool with straight drilled channels.
- Baffles: Split water flow inside core pins to improve heat transfer
- Bubblers: Direct coolant to the tip of small deep cores
- Heat pins: Transfer heat away from tiny, hard-to-reach features
Skipping these features saves mold build cost upfront but guarantees long cycles and warped parts in production.
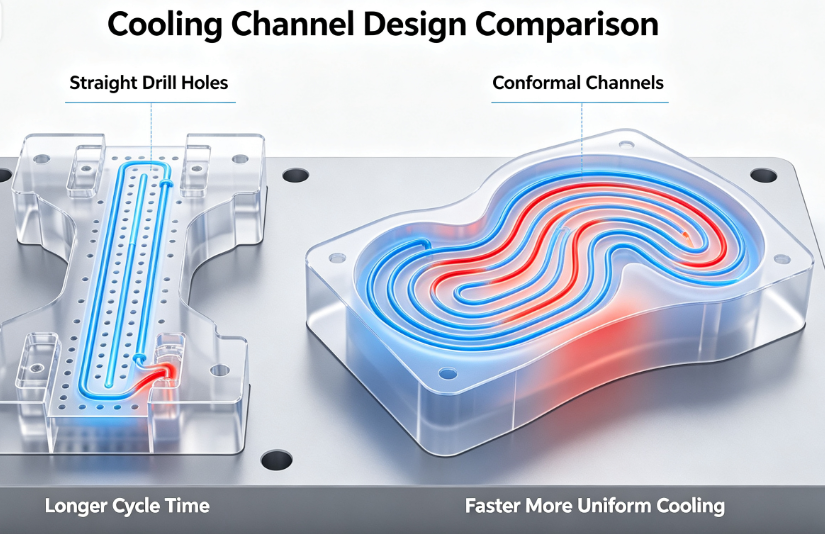
3. Adopt Conformal Cooling for Complex Geometry
Traditional straight drilling follows straight lines. Conformal cooling channels follow the contour of the part cavity.
Benefits:
- Eliminates unreachable hotspots around curved surfaces, thin walls and rib structures
- Far more balanced temperature across the entire component
- Typical cycle time reduction: 15%–35%
- Dramatically improved warpage control
Conformal cooling is manufactured via additive mold inserts. It is especially valuable for medium-to-high volume products with strict dimensional requirements, such as industrial housings and electronic enclosures.
4. Optimize Coolant Circuits & Flow Balance
- Separate core and cavity cooling circuits. Do not link them into one single loop.
- Design circuits to avoid dead zones where water stagnates.
- Match circuit length and flow resistance when running parallel loops.
- Use independent temperature controllers for critical mold inserts.
If core and cavity run at different temperatures, you can actively tune temperature difference to counteract natural shrinkage and reduce warpage.
5. Control Mold Temperature Strategically
Do not run all zones at identical temperature.
If one side of the part cools faster, plastic shrinks more on that side and pulls the component toward the colder surface.
Tactics:
- Raise mold temperature on sections prone to premature cooling
- Lower temperature on known hotspots
- Use zone-based temperature control for large mold inserts
6. Select Suitable Mold Base & Insert Materials
High-conductivity steels (e.g., BeCu, high-conductive tool steel) extract heat faster than standard P20 or S136.
Copper alloy inserts can be embedded in hotspot locations such as deep core tips to act as heat sinks. This is a low-cost upgrade if conformal cooling is out of budget.
Most Common Cooling Mistakes That Cause Warpage & Long Cycles
- Under-designed cooling for ribs and bosses Designers focus cooling on outer surfaces and ignore internal geometry, creating massive temperature imbalance.
- Long, unbalanced parallel cooling circuits Uneven water flow creates temperature drift across the mold.
- Small cooling channels with low flow rate Flow becomes laminar; heat transfer efficiency drops drastically.
- Mixing core and cavity cooling loops No independent temperature adjustment possible.
- Ignoring thermal simulation before machining the mold Building the mold first and fixing cooling issues after first shots is extremely costly. Mold modifications waste weeks of lead time.
- Overlooking insulation of hot runner systems Hot runner heat leaks into adjacent mold areas and creates unintended hotspots.
How Zorapid Delivers Optimized Mold Cooling For Your Projects
Many mold shops only start designing cooling after the cavity layout is finalized. At Zorapid, cooling strategy is considered at the earliest DFM stage.
Cooling analysis during mold quotation & DFM review
We evaluate your part geometry and identify potential hotspots before steel cutting. We flag features like deep ribs, tall bosses and thin walls that require enhanced cooling.
Two cooling tiers to match your production volume
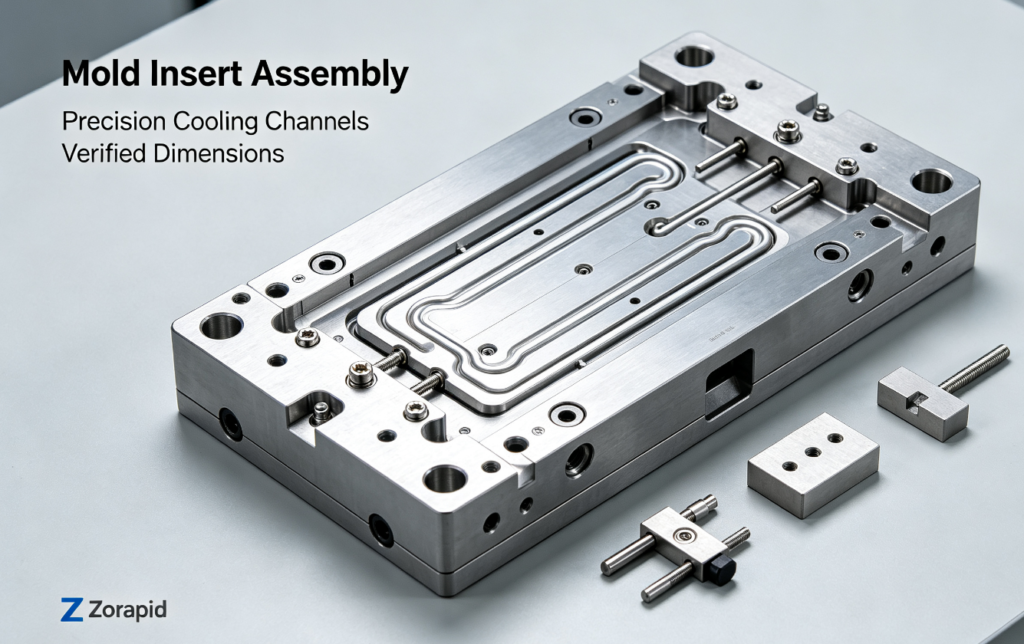
- Standard optimized drilled cooling circuits for low-to-medium volume programs
- Conformal cooling mold inserts for high-volume projects demanding minimum cycle time and tight dimensional control
Thermal simulation support on request
We run moldflow thermal analysis to predict temperature distribution, cooling duration and potential warpage trends. This avoids costly mold rework after first sampling.
Targeted use of high-conductivity mold materials
We integrate baffle, bubbler and copper heat sink inserts for hard-to-cool features without over-engineering the entire mold.
Complete cooling circuit balancing and testing before sampling
Once mold machining finishes, our team verifies water flow, checks for blockages and balances circuits before the first molding trial.
Data-driven process tuning during sampling
If initial parts show warpage, we adjust mold temperature zoning and evaluate whether minor cooling upgrades can stabilize dimensions, rather than only tweaking injection parameters.
Support prototype molds and production steel molds
Whether you need an aluminum rapid prototype mold or hardened production tooling, we apply consistent cooling best practices to reduce iteration cycles.
FAQ
How much cycle time reduction can I expect from better mold cooling?
For standard parts with basic cooling, optimized conventional cooling often cuts cooling time by 10%–20%. Conformal cooling typically delivers 20%–35% shorter cycles. Exact gains depend on part thickness, material and existing cooling design.
Is conformal cooling worth the extra mold cost?
Run a simple calculation: multiply cycle time savings by annual production volume. For high-volume runs, faster throughput quickly offsets higher insert cost. For low-volume prototypes, optimized traditional drilled cooling is usually the more economical choice. Zorapid can help you compare ROI for both options.
Can better cooling fully eliminate plastic part warpage?
Cooling optimization is the most effective way to minimize warpage, but it works alongside material selection, wall thickness uniformity and gate location. Severe uneven wall geometry will still create stress. We combine cooling design with DFM geometry adjustments for the best result.
What is the difference between baffles and bubblers?
Bubblers are used for smaller-diameter deep cores. Baffles suit larger core pins to split coolant flow and push water toward the core tip. Our mold designers select the correct hardware based on your feature dimensions.
Does cooling optimization affect surface finish?
Yes. Stable, consistent mold temperature reduces sink marks, flow marks and surface defects. Hotspots often cause visible blemishes on cosmetic surfaces, so improved cooling helps both aesthetics and dimensional stability.
Should I use chilled water or regular cooling water?
Chilled water increases heat removal speed but raises operational cost. For most PC/ABS, Nylon industrial components, controlled-temperature water heaters are preferred to maintain stable mold temperature rather than simply running colder water. Material grade dictates the best approach.
If my existing mold suffers from warpage, can cooling be modified later?
Sometimes. Modification options depend on mold structure. If no space exists to add new channels, you may need heat sink inserts or revised molding process parameters. In many cases, fixing cooling during initial mold design is far cheaper than retrofitting.
Closing Thoughts
Cycle time and warpage are not just “process issues” — they are mostly mold design issues driven by cooling performance.
Tweaking injection pressure and speed can only compensate so much. Well-planned cooling balances temperature across the entire component, cuts required cooling time and keeps shrinkage predictable.
If you are developing a new injection mold or struggling with warped parts and slow cycle times, Zorapid’s engineering team can review your part design and mold layout. We propose practical cooling improvements matched to your volume target and budget.
Send your 3D CAD for a DFM and cooling strategy review today.