Published by: Zorapid.Ltd
3-axis vertical mills are the backbone of every machine shop. Flat plates, simple brackets, top-side holes — these jobs run fast and cheap with X, Y, Z linear motion only.
But the trouble starts the second your part has features on four sides, angled pockets, or cutouts wrapped around a cylinder.
Running these jobs on a standard 3-axis machine means stopping production, re-clamping the part, rebuilding fixtures, and re-probing datums over and over.
At Zorapid, we run dozens of multi-face and cylindrical components every week. We repeatedly see three costly problems with 3-axis-only processing:
- Position tolerance drifts after every re-fixture
- Setup time balloons and kills throughput
- Labor and custom fixture costs push total pricing way higher
Adding a 4th rotational axis (A-axis indexing) solves most of these headaches without jumping straight to expensive 5-axis equipment.
This article breaks down the core differences between 3-axis and 4-axis milling. We lay out clear rules to decide when sticking with 3-axis makes sense, and exactly when upgrading to 4-axis indexing will cut scrap, tighten GD&T accuracy, and lower your overall production cost. We also share a real production case where switching to 4-axis cut total lead time by 42%.
If you keep fighting re-clamping errors on multi-sided parts, this guide will help you pick the right process without overinvesting in equipment.
How 3-Axis and 4-Axis Milling Actually Work
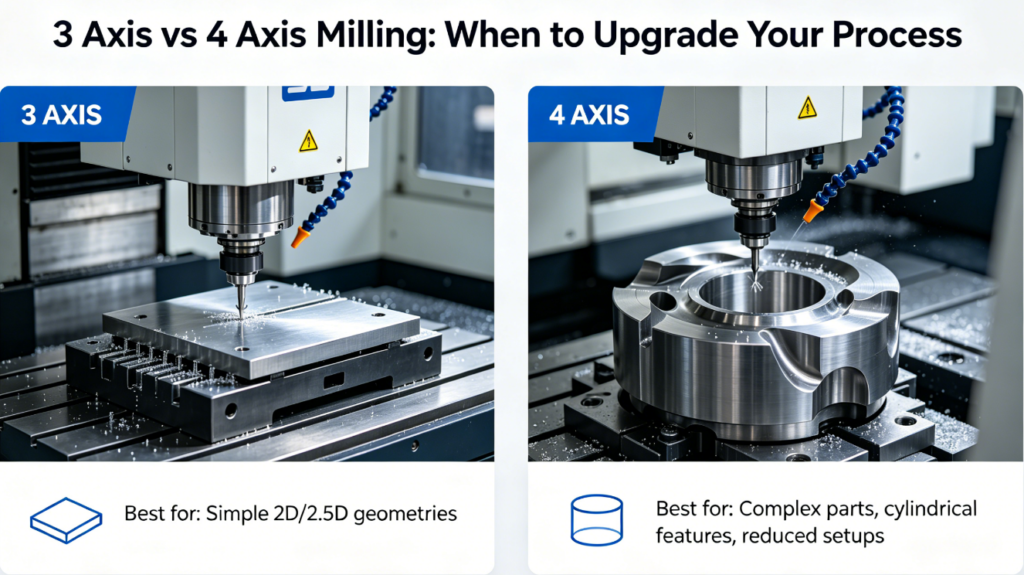
3-Axis Milling (X-Y-Z Only)
The workpiece stays locked in one fixed position. Only the spindle moves linearly left-right, front-back, up-down.
You can only machine features facing straight upward. To mill other sides, you must manually unclamp, flip or rotate the part, reset zero points, and build new holding fixtures.
Best for flat, single-sided geometry with no wrapped or angled features.
4-Axis Milling (X-Y-Z + Rotary A-Axis)
It keeps all three linear spindle movements, plus adds one full 360° rotational axis for the workpiece.
Two common working modes:
- Indexing Mode (95% of our shop work) The rotary table spins the part to a precise fixed angle, locks it solid, then the spindle cuts just like a standard 3-axis program. No continuous rotation during cutting.
- Continuous 4-Axis Cutting The part spins slowly while the tool feeds along the length, perfect for spiral grooves and cylindrical cutouts.
The biggest game-changer: most multi-face parts get fully finished in a single clamping. No repeated flipping, no repeated datum probing.
Direct Head-to-Head Comparison: 3 Axis vs 4 Axis Milling
| Evaluation Item | 3-Axis CNC Milling | 4-Axis Indexing Milling |
|---|---|---|
| Number of Setups for 4-sided part | 3~4 separate re-clamps | 1 single setup |
| Position Error Source | Cumulative drift after every re-fixture | Minimal datum shift; one zero point only |
| Fixture Cost | Multiple custom jigs, soft jaws, angle plates | One simple rotary workholding; no extra angled fixtures |
| Total Setup Time | 2.5~4 hours per batch | 30~75 minutes total |
| Cycle Time | Frequent machine stops for rework | Uninterrupted continuous cutting |
| Tolerance Stability | Hole-to-hole GD&T drifts easily | Consistently holds ±0.005mm across all faces |
| Programming Difficulty | Basic G-code only | Moderate CAM work for indexed rotation |
| Per-Part Cost (simple flat plate) | Lowest cost | Slightly higher hourly machine rate |
| Per-Part Cost (multi-sided cylinder) | Very high (fixture + labor + scrap) | Far lower overall cost |
Key takeaway: 3-axis wins for flat single-face plates. 4-axis dominates once you need features on 3 or 4 sides of the same workpiece.
Core Advantages of Upgrading to 4-Axis Milling
Advantage 1: Eliminate Cumulative Position Errors from Re-Clamping
Every time you unbolt and reposition a part on 3-axis, small alignment errors stack up.
Holes drilled on Side 1 will no longer line up perfectly with holes on Side 3 after flipping. Datum shift ruins hole pattern true position and perpendicularity specs.
With 4-axis indexing, the part never leaves the rotary chuck. The original zero point stays locked for the entire job.
We regularly hold tight GD&T true position across all four faces that would fail batch inspection on a 3-axis mill.
Advantage 2: Slash Fixture Building & Manual Labor
Multi-sided 3-axis jobs require angle plates, V-blocks, custom soft jaws, and multiple dedicated jigs. Fixture machining alone eats up hours of machine time and engineering labor.
On a 4-axis rotary table, you just clamp the blank into a 3-jaw chuck or collet. The machine rotates the part automatically to every required angle. No custom holding hardware needed.
For low-volume R&D batches, this cuts fixture expenses by 60% or more.
Advantage 3: Shorten Total Run Time by Removing Machine Downtime
3-axis workflow: Cut one face → Stop machine → Unclamp → Reorient → Re-probe zero → Re-clamp → Restart cutting.
Half your total production time is wasted on setup instead of actual metal removal.
4-axis workflow: Clamp once → Run all indexed rotations automatically → Finish all faces in one continuous program.
Machine uptime jumps sharply, and you can run more parts per shift without extra operators.
Advantage 4: Reach Angled & Cylindrical Features Without Long, Unstable Tools
When milling angled pockets on 3-axis, you must use long extended tool holders to reach deep angled surfaces. Long tools vibrate, create chatter marks, and lose rigidity.
The 4th axis tilts the workpiece so the cutting surface faces straight up. You use short, rigid end mills, improve surface Ra, and reduce tool breakage drastically.
Long slender cutters become unnecessary for angled milling work.
Advantage 5: Machine Wrapped, Spiral & Perimeter Cylindrical Geometry
3-axis machines cannot machine continuous grooves, slots, or cutouts wrapped around a round shaft without multiple complicated re-fixtures.
4-axis continuous rotation lets you mill spiral oil grooves, peripheral slots, and engraved patterns along the full circumference of bar stock in one pass. This capability is impossible to replicate efficiently on standard 3-axis equipment.
When You Should Stick Strictly With 3-Axis Milling
Upgrading to 4-axis adds higher machine hourly rates and extra CAM programming work. It does not make economic sense for every job.
Keep using 3-axis milling if all these conditions apply:
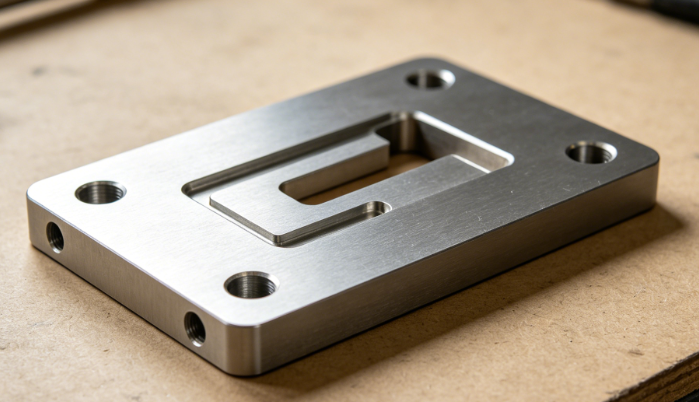
- All critical features sit only on the top face; you only need one or two simple sides finished
- The part is a flat aluminum plate, simple bracket, or rectangular block with no angled pockets or wrapped contours
- Batch size is large, geometry is basic, and you can hold tolerances with simple vise clamping
- No strict hole-to-hole positional GD&T across multiple perpendicular faces
- You have zero cylindrical or rotational features around the part perimeter
For basic 2.5D flat parts, 3-axis remains the lowest-cost option. Adding a 4th axis will only raise your quotation price with zero quality gain.
Clear Trigger Points — It’s Time to Upgrade to 4-Axis Processing
Switch your process from 3-axis to 4-axis milling as soon as any one of these conditions appears on your drawing:
Trigger 1: The part requires machining on 3 or 4 perpendicular faces
Each extra re-clamp brings new positioning drift. Three re-fixtures almost guarantee you will struggle to hold cross-face hole position tolerances. 4-axis indexing locks all datums permanently.
Trigger 2: You need angled pockets, tilted slots, or chamfers on side walls
Long overhanging tools create chatter and poor finish on 3-axis. Rotate the part upward on 4-axis, cut with short rigid tools, and eliminate vibration entirely.
Trigger 3: The part is cylindrical, tubular, or bar stock with perimeter cutouts
Spiral grooves, cross holes around a shaft, and peripheral slots become low-effort jobs on a rotary 4th axis. On 3-axis, these become complicated fixturing nightmares with high scrap risk.
Trigger 4: Repeated re-clamping pushes your setup labor cost too high
If you spend more time flipping parts and rebuilding jigs than actual cutting time, 4-axis indexing will cut total lead time and lower your final part price.
Trigger 5: Your GD&T requires tight true position between features on different sides
Cross-face hole patterns, perpendicularity, and concentricity will drift with every manual repositioning. One-setup 4-axis machining eliminates this stack-up error completely.
Trigger 6: Thin-walled parts deform from repeated clamping pressure
Multiple vise squeezes bend delicate thin walls. One single clamping on the 4-axis chuck keeps part geometry stable through the whole machining sequence.
4 Common Pitfalls If You Force Multi-Face Jobs Onto 3-Axis Mills
We see these four recurring failures from customers who avoid 4-axis indexing to save machine cost:
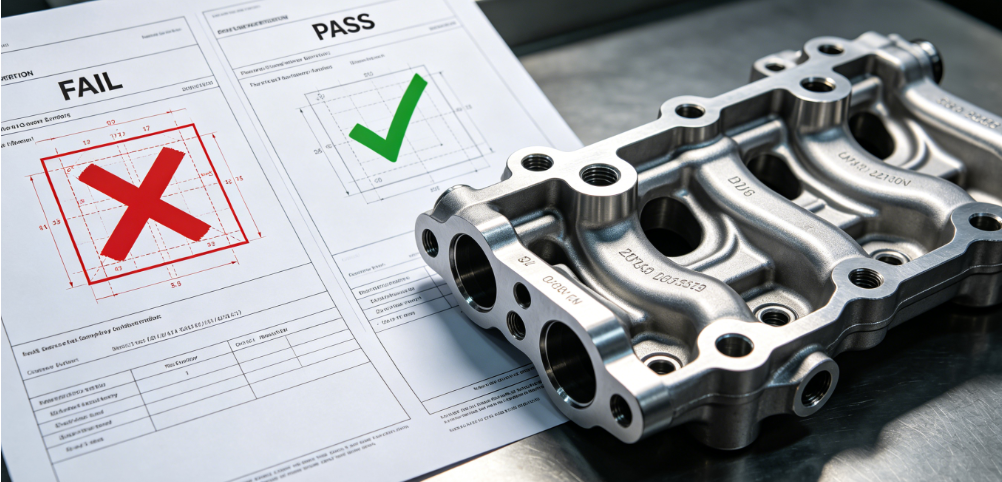
- Position tolerance stack-up fails CMM inspection Three separate re-clamps create cumulative offset. Hole patterns on opposing sides drift outside GD&T limits, leading to batch rejection.
- Excessive fixture cost eats all profit margin Custom angle plates, V-blocks, and dedicated soft jaws cost time and material. Fixture expense often exceeds the cost of the actual machined parts for small batches.
- Thin parts bend under repeated vise clamping Each new clamping cycle squeezes the blank differently. Thin aluminum or stainless components warp between setups.
- Long tools cause chatter and poor surface finish To reach side pockets on 3-axis, operators extend tool length. Vibration leaves visible chatter lines that require extra hand polishing.
Zorapid Real Case Study: 3-Axis Rework Switched to 4-Axis Indexing
Project Details
4-sided aluminum hydraulic manifold block with cross holes and angled side pockets.
Batch size: 35 pieces, strict cross-face hole true position ±0.01mm GD&T requirement.
Original 3-Axis Process Problems
- 4 separate clamping cycles for all four sides
- Total setup time hit 3.5 hours per batch
- Hole position drifted after re-fixturing; scrap rate reached 26%
- Multiple custom angle fixtures added extra cost and lead time
Our 4-Axis Process Upgrade
- Mount the blank into the 4th axis rotary indexing chuck, one single clamping only
- Program indexed 90° rotations to machine all four faces automatically
- Cut angled side pockets by rotating the workpiece upward, using short rigid end mills
- Keep one fixed master datum for the full program; zero repeated probing
Final Outcome
- Total setup time dropped from 3.5 hours down to 45 minutes
- Position drift was eliminated entirely; scrap rate fell below 0.7%
- Cross-hole GD&T stayed consistently within tolerance across the full batch
- Total production lead time shortened by 42% with no secondary rework
Quick Decision Checklist You Can Use For Every New Part
Stick with 3-axis milling if:
Only top-side 2.5D geometry | Max two faces to machine | No strict cross-face GD&T | Flat rectangular plate only
Upgrade to 4-axis indexing milling if:
3+ machined faces | Angled pockets or side slots | Cylindrical bar stock features | Tight cross-face hole position | Multiple re-clamps required on 3-axis
Run this check before writing your CAM program, and you will avoid unnecessary scrap and long setup delays.
How Zorapid Optimizes 3-Axis & 4-Axis Workflow For Your Parts
With 20+ years of CNC milling for aerospace, automation, fluid power and medical hardware, we select the most cost-effective axis configuration for every job:
- Free DFM process review: We flag multi-face re-clamping risks and recommend 3-axis vs 4-axis before programming starts
- Full 4-axis indexed programming with VERICUT collision simulation to avoid fixture crashes
- Rigid rotary workholding to maintain datum stability for tight GD&T runs
- Separate quoting routes: low-cost 3-axis for simple flat parts; single-setup 4-axis for multi-sided cylindrical manifolds and shafts
- First article CMM inspection to verify cross-face positional accuracy before mass production
We never over-quote multi-axis machine time, and we never force complex geometry onto under-equipped 3-axis mills. We match the process strictly to your part geometry and tolerance requirements.
Conclusion
3-axis milling remains the most economical choice for flat, single-sided 2.5D components. But once your job needs machining on multiple perpendicular faces, angled pockets, or cylindrical perimeter features, sticking with repeated 3-axis re-clamping creates tolerance drift, long setup times, high scrap and inflated fixture costs.
Three simple rules to guide your process upgrade:
- Use 3-axis for basic flat plates with only one or two machined sides.
- Switch to 4-axis indexing as soon as three or four faces need machining, or cross-face GD&T must stay precise.
- The 4th axis eliminates repeated clamping, cuts setup labor, and keeps your datum locked from start to finish — without jumping to expensive 5-axis equipment.
Choosing the right axis configuration cuts production delays and keeps your batch quality consistent.
Send your STEP file to Zorapid today. Our process engineers will select 3-axis or 4-axis milling and send you a optimized quotation within 24 hours.
FAQ
Is 4-axis indexing the same as full simultaneous 4-axis milling?
No. 90% of our multi-face jobs use indexing mode: the rotary locks at fixed angles, and the machine runs standard 3-axis toolpaths. Simultaneous continuous rotation is only used for spiral grooves and cylindrical perimeter cutting. Indexed 4-axis programming is far simpler and more affordable for most CNC shops.
Can I hold tighter tolerances on 4-axis than repeated 3-axis clamping?
Yes. Every re-fixture adds small alignment error. One single clamping on a 4th axis rotary table removes all cumulative datum shift, making cross-hole true position far more stable.
Does 4-axis always cost more per part than 3-axis?
For simple flat parts, yes. For multi-sided 4-face blocks and cylindrical shafts, 4-axis lowers total cost by eliminating expensive custom fixtures and scrap from re-clamping errors. The higher machine hourly rate gets offset by labor and scrap savings.
Can angled surfaces only be machined on 4 or 5-axis machines?
You can tilt parts with angle plates on 3-axis, but this creates unstable long tool extensions. 4-axis rotation tilts the workpiece upward, so you cut with short rigid tools for better finish and less tool wear.
Do I need to switch to 5-axis if I already have 4-axis indexing?
Not for most multi-sided manifold and shaft jobs. 4-axis indexing handles nearly all angled and peripheral features. Only freeform compound curved surfaces require upgrading to full 5-axis milling.