Published:Zorapid.Ltd
Most injection mold projects burn cash not on steel material, but on repeated T1, T2, T3 trials and endless mold rework.
You finish your 3D CAD file, send it to the mold shop, and wait for samples.
What you get instead: warped edges, surface sink marks, stuck parts, and a long bill for steel modification.
Every late design fix costs 10x more than changes made before cutting the mold steel.
If you skip DFM review, your sampling cycles jump from 1–2 rounds up to 4–6 rounds.
Your launch timeline slips 3–5 weeks, and revision bills pile up fast.
At Zorapid, we run DFM analysis for 200+ plastic tooling projects yearly.
Clients who add upfront DFM cut mold modification cost by 65% and nail first-shot success consistently.
Today we break down actionable DFM rules to cut trial rounds and kill unnecessary rework, no fancy jargon.
Why Late Mold Revisions Drain Your Budget
Let’s stick to real project numbers from our manufacturing records.
- Fixing geometry errors in the CAD design stage: Only engineering labor, $250–750 total.
- Revising mold steel after T1 sampling: CNC machining, re-heat treatment, re-polishing. Average cost: $4,800 to $23,000 per revision.
- Extra cost does not stop here. Extra sampling, resin waste, air freight and delayed product launch add another 30% overhead.
Industry average without DFM:
- Trial rounds: 4.9 times
- Tool modification cost: $73,800 per project
With strict pre-tooling DFM review (Zorapid standard):
- Trial rounds drop to 1.4 times
- Rework cost falls to $14,200 on average.
Small geometry oversights turn into massive budget losses.
The root cause? No DFM check before mold steel starts cutting.
Common defects that trigger most mold revisions:
Sink marks, part warpage, short shots, ejection burrs, weld line failure, undercut structure stuck issues.
All these problems can be flagged and fixed during DFM, long before you mill the mold base.
6 Core DFM Rules to Eliminate 90% of Sampling Defects
We keep these 6 items as our non-negotiable DFM checklist for every injection project.
Stick to them, and you will slash trial cycles drastically.
Rule 1: Keep Wall Thickness Uniform (Top Cause of Sink & Warpage)
Uneven wall thickness is the No.1 trigger of sampling failure.
Plastic sections with different thickness cool at different speeds.
Thick areas shrink more and pull the surface inward, creating obvious sink marks on cosmetic surfaces.
Zorapid DFM Standard:
- Main wall thickness stays 1.5mm ~ 3.0mm for ABS, PP, PC & Nylon.
- Thickness variation cannot exceed 25% of the nominal wall value.
- Add full-radius fillets (R ≥0.5mm) at all thickness transition points. Never use sharp 90° corners.
Bad practice: Thick bosses attached directly to thin outer walls.
Fix: Thin down the boss thickness to max 60% of the main wall, add fillet transition.
Rule 2: Lock Draft Angles to Avoid Ejection Damage
Zero or insufficient draft makes parts stick tightly inside mold cavities.
You get scratch marks, white ejection blemishes, and you have to rework the mold cavity surface repeatedly.
Zorapid DFM Draft Standard:
- Smooth non-textured surface: Minimum 0.5° draft
- Textured cosmetic surface: 1.5° minimum draft
- Deep cavity vertical walls: Raise draft up to 3° to reduce ejection resistance.
We see dozens of European clients submit zero-draft 3D files every month.
Adding 1° draft in CAD costs nothing, but avoids $3k+ cavity rework later.
Rule 3: Optimize Rib & Boss Geometry to Prevent Sink Marks
Reinforcing ribs strengthen parts, but poorly sized ribs ruin surface quality.
If your rib is too thick, the plastic cools slowly and creates dents on the outer face.
DFM Rib Rule:
Rib thickness ≤ 60% of the adjacent main wall.
Keep rib height below 3x the rib width.
Add small fillets at rib root to lower internal stress and warpage risk.
Rule 4: Gate Location = Fewer Weld Lines & Short Shots
Bad gate placement leads to unbalanced melt flow.
You get incomplete filling, strong weld lines on structural zones, and uneven shrinkage.
DFM Gate Best Practice:
- Place gates on non-cosmetic hidden surfaces.
- Balance flow path length for multi-cavity molds.
- Avoid positioning gates right next to thick bosses or heavy ribs. If you place the gate correctly in DFM, you cut 1–2 unnecessary sampling rounds immediately.
Rule 5: Limit Undercuts to Cut Slider & Lifter Cost
Every undercut feature needs side sliders or lifter mechanisms inside the mold.
Each extra slider raises mold cost by 20~30% and increases fitting difficulty.
More moving parts mean more mold fitting work and higher trial failure risk.
DFM Optimization Tip:
Revise part geometry to remove shallow undercuts (depth <0.5mm).
Use forced demolding instead of adding complicated side actions wherever possible.
This alone saves thousands in mold structure cost and fitting time.
Rule 6: Pre-Plan Cooling Layout in DFM Phase
Uneven cooling is the main driver of long cycle time and consistent warpage across batches.
We map cooling channel layout during DFM, not after mold steel is cut.
Standard cooling rule we follow:
Water channels stay 30–50mm apart from each other and cavity surface.
Add conformal cooling near thick bosses and deep ribs to balance cooling speed.
Balanced cooling means fewer warped samples and less post-tweak on mold temperature settings.
Once we finish these 6 checks, over 90% of predictable sampling defects get wiped out entirely.
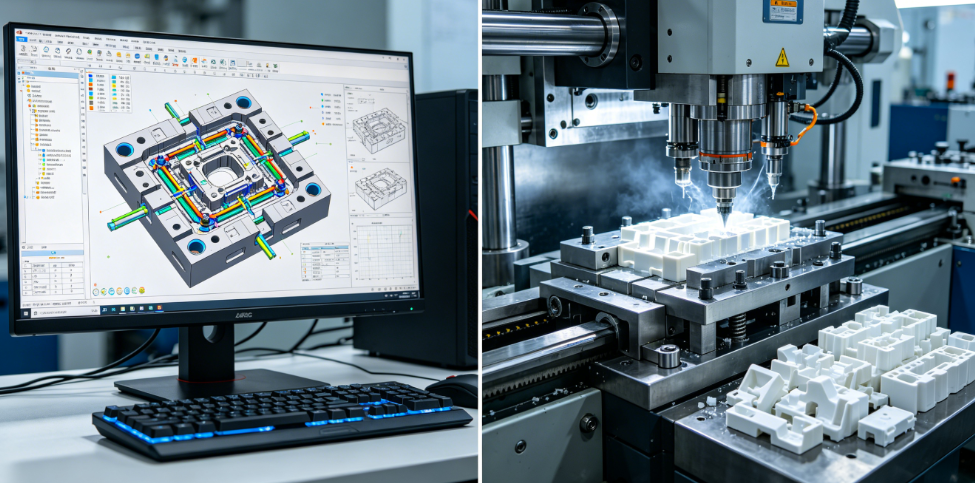
Pair DFM with Moldflow Simulation to Avoid Blind Trials
Basic DFM catches geometry errors.
Add Moldflow flow analysis, and you no longer rely on guesswork during T1 testing.
What we simulate in Zorapid’s pre-tooling workflow:
- Melt front filling sequence
- Weld line position & strength
- Shrinkage rate and part warpage value
- Air trap & short shot risks
- Cooling time and cycle length
The simulation report quantifies warpage deflection down to 0.02mm accuracy.
We adjust gate position, wall thickness and resin choice before steel cutting.
Result: No more blind trial and error.
Our clients often get qualified parts on the first T1 shot, without a second sampling round.
Real Zorapid Case Study
Client Issue
A German automotive OEM submitted a plastic enclosure 3D file.
Original design had:
- 0° vertical draft on textured outer surfaces
- Wall thickness jumping from 1.2mm to 3.6mm without fillet
- Over-thick ribs causing severe sink mark risk
- Two unnecessary undercuts requiring extra sliders
If we built the mold directly:
- Expected trial rounds: 4~5 times
- Estimated steel revision cost: $11,600
- Launch delay: 4 weeks
Our DFM Action
- Added 1.5° draft on all textured vertical walls
- Uniformed wall thickness within 20% variation + added R0.6 fillets
- Resized ribs to stay under 60% of main wall thickness
- Revised geometry to remove two shallow undercuts, eliminate slider structures
- Ran Moldflow to reposition the side gate and balance melt flow
Final Outcome
- Only 1 T1 trial, no second sampling needed
- Zero steel revision work after sampling
- Total rework cost cut by 72%
- Project launch stayed on original schedule
This is the typical ROI of a strict upfront DFM process.
Zorapid Standard DFM Workflow for Injection Molds
We run this 4-step process for every overseas mold order:
- 3D File Submission You send STEP/IGS + 2D drawings; our engineers start DFM review within 24 working hours.
- Full DFM Report Release We list all risks: thickness issue, draft shortage, undercut, gate flaw, cooling imbalance, with marked screenshots on your 3D model. We attach clear revision suggestions.
- Moldflow Simulation (Optional but Recommended) Predict filling, warpage and surface defects; adjust design iteratively with your team.
- Confirm Revised 3D, Then Start Mold Machining We only cut steel after both parties sign off the optimized design file. No last-minute surprises.
We do not start tooling before DFM approval.
This strict rule keeps our clients away from costly post-mold modifications.
FAQ
How much can DFM reduce injection mold trial & revision cost?
With complete pre-tooling DFM + flow simulation, most clients cut rework cost by 60~75% and lower sampling rounds from 4+ down to 1~2 times only.
Can DFM eliminate sink marks and warpage completely?
DFM fixes all geometry-caused warpage and sink risks. When paired with Moldflow analysis, first-shot qualified rate can hit 95% for standard plastic parts.
Do I need to pay extra for a DFM report?
Zorapid provides basic DFM risk analysis free of charge for all mold quotation projects. We only charge fees for advanced Moldflow warpage simulation.
How long does a standard injection mold DFM review take?
Simple parts: 1 working day. Complex thin-wall automotive & medical housings: 2~3 working days. The small wait saves weeks of trial delay later.
Closing
Repeated mold trials and steel revisions are avoidable waste, not mandatory cost.
A few hours spent on DFM before steel cutting beats thousands spent on post-tool rework.
If you want to cut sampling cycles, lock first-shot success, and trim your injection mold modification budget, send your 3D files to Zorapid today.
Our engineering team will deliver a detailed DFM risk report with actionable design tweaks, free of charge for mold quoting.