Published:Zorapid.Ltd
Building medical injection molds is nothing like making regular consumer tooling.
One wrong steel grade, one bad machining pass, and you get surface pitting, trapped bacteria, or failed FDA validation.
Corrosive medical resins, repeated autoclave cleaning, strict biocompatibility rules, and ultra-smooth cavity finishes raise the bar drastically.
Standard P20 or 718 steel will rust, stain, and leave micro-defects that ruin disposable diagnostic parts and implant components.
At Zorapid, we build cleanroom-grade molds for syringes, catheter housings, microfluidic chips, and PEEK implant parts. We’ve sorted out material matching and precision machining for hundreds of Class I & Class II medical devices.
Today we break down our field-tested material matrix, costly mistakes to avoid, and step-by-step CNC + EDM machining rules you can apply right away.
Negotiable Rules For All Medical Mold Steel
Before picking any alloy, lock down these three core requirements. Regulators and cleanroom production will enforce them strictly.
- Corrosion resistance first Molds face acidic off-gassing from PVC, POM, halogenated medical plastics, plus constant alcohol and steam sterilization. Carbon steel will corrode within thousands of shots, contaminating molded parts. Only stainless ESR-remelted steel qualifies for medical applications.
- High polishability (Ra ≤ 0.02 μm for critical cavities) Smooth surfaces prevent bacterial buildup and eliminate tiny blemishes on transparent medical components. Poor polish will automatically fail bioburden testing.
- Fully traceable material certification You need mill test reports, heat treatment logs, and low impurity ESR/VAR refined steel. No uncertified bulk steel for FDA-mandated projects.
Skip any one rule, and your mold will never pass ISO 13485 validation.
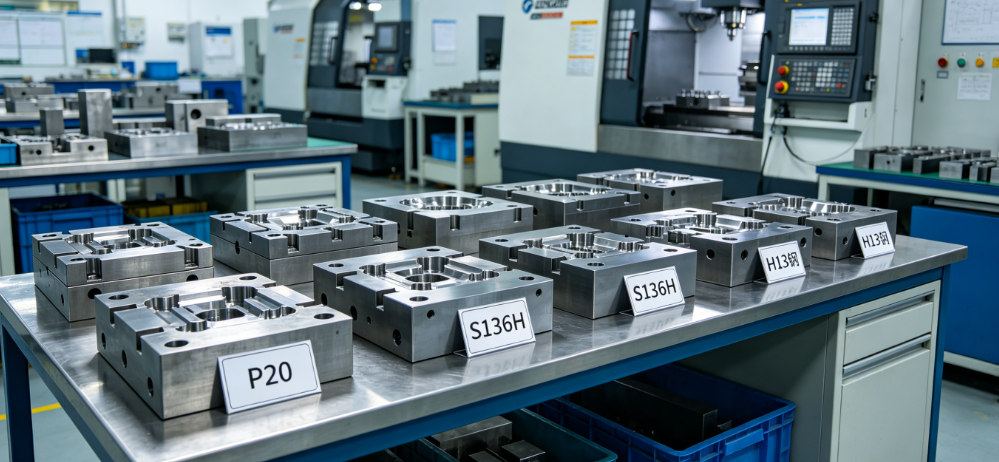
Zorapid’s Go-To Medical Mold Steel Lineup
Most buyers overspend on high-end steel for low-volume prototypes, or cut corners and pick carbon steel for corrosive resins.
We match material strictly based on shot count, plastic type, and medical device class.
| Steel Grade | Hardness (HRC) | Core Medical Advantages | Best Use Cases |
|---|---|---|---|
| NAK80 Pre-Hardened | 38–42 | No heat treatment needed, ultra-high gloss polish, stable dimensions | Low-volume prototypes, cosmetic medical housings, ABS & PC non-corrosive resin jobs |
| 1.2316 (420 Stainless) | 48–52 | Good rust resistance, clean ESR microstructure, affordable stainless option | Medium-run disposable consumables, IV connectors, plastic casings |
| S136 / M310 Stainless (ESR) | 50–54 | Maximum corrosion resistance, SPI A1 mirror polish, zero metal ion precipitation | PVC, flame-retardant polymers, transparent optics, syringes, catheter molds (FDA primary choice) |
| H13 (1.2344) | 48–52 | Extreme wear resistance for glass-filled PEEK & UHMWPE | High-volume abrasive filled medical resins, implant mold inserts |
| Beryllium Copper Inserts | 30–38 | Fast heat dissipation, shortens molding cycle time | Deep thick-walled diagnostic part cores, hot spot cooling inserts |
Quick Selection Cheat Sheet
- Prototype runs (<50k shots, non-corrosive plastic): NAK80
- Medium production, disposable plastic parts: 1.2316 stainless
- Transparent, corrosive resin, cleanroom long-run production: S136 ESR stainless steel
- Glass-filled high-temperature PEEK implant material: H13 hardened steel inserts
Critical Machining Mistakes That Ruin Medical Mold Surfaces
Medical molds fail mostly not from bad steel, but from poor CNC and EDM practices.
Here are the four most common shop errors we fix every month.
Mistake 1: Leaving EDM recast layer on cavity surfaces
Conventional sinker EDM creates a thin hardened white layer. This layer has micro-cracks, traps bacteria, and cannot be polished clean.
On syringe and microfluidic molds, this defect will show up as tiny specks on every molded part.
Mistake 2: Heavy work hardening during hard milling of S136
Stainless mold steel work-hardens fast if the cutter rubs instead of cutting. You end up with tool chatter and uneven surface texture that ruins mirror polishing.
Mistake 3: Vibration causing fine tool marks on high-gloss cavities
Long tool extensions create minor wobble. Even 0.01 mm runout leaves visible lines that cannot be sanded out without losing dimensional tolerance.
Mistake 4: Dirty coolant leaving surface staining
Unfiltered machining fluid leaves micro-residues. After heat treatment, these spots turn into permanent discoloration on stainless steel cavities.
We eliminate all four issues with our standardized machining workflow.
CNC Machining Tips for 3 Top Medical Mold Steels
1) Machining NAK80 (Pre-Hardened No-HT Steel)
NAK80 machines easily and barely work-hardens. It is our top pick for fast medical prototypes.
- Tool: Positive-rake solid carbide end mills
- Roughing SFM: 180–220, climb milling only
- Finish pass: 0.03–0.06 mm depth of cut, feed reduced by 30%
- Key tip: Leave just 0.08–0.12 mm stock for polishing. Too much stock creates uneven surface texture.
- Do NOT grind large flat areas; high-speed milling delivers a finer starting surface for mirror finishing.
2) Machining 1.2316 / S136 Hardened Stainless Steel (Most Common Medical Grade)
S136 is the backbone of FDA-compliant molds. Hard milling requires strict heat control.
- Tool: AlTiN coated solid carbide cutters, sharp edge prep (no honed heavy edges)
- Roughing SFM: 70–110, avoid slow rubbing cuts
- Finishing SFM: 40–65, small stepover to prevent surface hardening
- Stick to short tool holders. Tool overhang cannot exceed 3× cutter diameter to kill vibration.
- Coolant rule: Use fully filtered flood coolant. Stop mist cooling on stainless steel — trapped heat creates discoloration.
- Critical rule: Never let the cutter dwell on corners. Program corner slowdowns to avoid localized hard spots.
3) Machining H13 for Abrasive PEEK Resin Inserts
Glass-filled medical plastics chew through unhardened steel. H13 inserts hold up for millions of cycles.
- Rough machine in annealed state, then vacuum heat treat to HRC 50–52
- Post-heat-treat finish milling with light cuts only. Heavy cuts will introduce thermal distortion.
- Leave 0.05 mm stock for surface grinding on shut-off edges to maintain micron-level flatness.
EDM & Polishing Rules For Cleanroom-Grade Cavities
This step separates regular molds from medical validated tooling.
- Remove the EDM recast layer completely After sinker EDM on deep ribs and micro-slots, perform a fine grinding or small ball end mill cleanup pass. No white layer allowed on any food/medical contact surface.
- Progressive polishing sequence (SPI A1 Ra ≤0.02 μm) Start with 800 grit diamond stone → 1500 grit → 3000 grit → diamond buff. Always polish in one consistent direction to avoid swirl marks.
- No chrome plating or nickel plating on cavity surfaces Plating can flake and shed metal particles, violating biocompatibility rules. Use PVD DLC coating only if extra wear resistance is needed for high-volume runs.
- Final ultrasonic cleaning After polishing, ultrasonically degrease the entire mold block to remove all polishing paste residue before assembly. Even tiny leftover grit creates molded part blemishes.
Heat Treatment & Dimensional Stability
Microfluidic channels and thin-wall catheter cavities cannot shift after hardening.
Our process to control distortion:
- Stress-relieve the raw steel block before any CNC roughing
- Rough machine, leave 0.3–0.5 mm stock all around
- Vacuum heat treatment (no air furnace oxidation) with slow tempering cycles
- Finish mill and EDM only after the steel cools fully to room temperature
For S136 medical molds, vacuum quenching plus double tempering keeps total distortion under 0.008 mm across the full cavity plate.
Zorapid Real-World Medical Mold Case Study
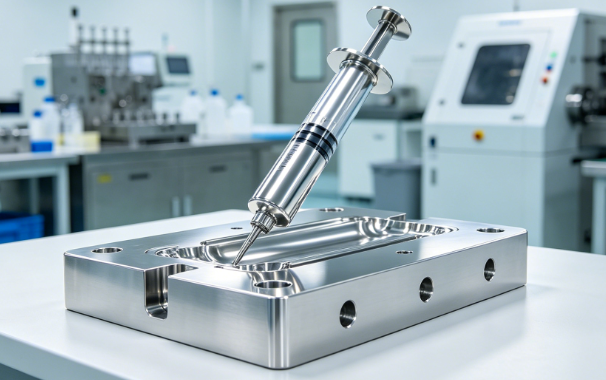
Project: Single-cavity syringe mold (Class II medical device)
- Mold steel: ESR refined S136, heat treated to HRC 52
- Requirement: SPI A1 mirror finish, Ra < 0.02 μm, zero surface pitting, 1 million shot service life
- Initial shop failure: Conventional 3-axis milling + rough EDM left recast layers and fine chatter marks. Polishing could not erase micro-cracks; trial molded parts had tiny pinholes.
- Our optimized process:
- 5-axis simultaneous hard milling with rigid short tools, no vibration on thin shut-offs
- Fine mill cleanup pass after EDM to strip the recast white layer
- Progressive diamond polishing + ultrasonic deep cleaning
- Final result: CMM dimension tolerance held within ±0.006 mm. Cavity surface passed bioburden testing, no corrosion after 6 months of repeated EO sterilization cycles. The mold cleared full FDA pre-production validation on the first try.
Final Cost-Saving Guidance For Medical Mold Projects
- Do not default to S136 for short-run prototypes. NAK80 cuts lead time and material cost by 35% while still delivering medical-grade surface finish.
- Only use ESR-refined steel for cavities; standard air-melt steel has too many micro-inclusions for transparent medical parts.
- Complete DFM analysis before machining. We check wall thickness, vent positions, and machining reach to avoid costly rework on hardened stainless steel.
- Document every step: steel certs, heat treatment curves, surface roughness reports, and CMM inspection data. This paperwork is mandatory for ISO 13485 and FDA device validation.
Zorapid builds fully validated medical injection molds from prototype inserts up to multi-cavity cleanroom production tools. We handle S136, NAK80, H13 and beryllium copper tooling with ultra-precision CNC, wire EDM and mirror polishing.
Send over your STEP files for a free DFM review and material recommendation tailored to your resin and shot count.
FAQ
Is S136 mandatory for all medical injection molds?
No. For short-run non-corrosive PC/ABS prototypes, NAK80 pre-hardened steel works perfectly and costs far less. S136 only becomes required for corrosive resins, transparent optics, long cleanroom runs, and parts requiring strict corrosion resistance after repeated sterilization.
Why does EDM create micro-cracks on medical mold steel?
The electrical discharge melts the steel surface and leaves a brittle recast white layer. This layer contains tiny unseen cracks that cannot be polished away. Always add a small finish milling pass to strip this layer before polishing any food-contact or medical cavity.
Can we use regular polishing paste on S136 medical cavities?
Never use standard polishing compounds. Residue gets trapped in micro-pores and causes contamination. After polishing, you must perform full ultrasonic solvent cleaning to remove all leftover paste to pass bioburden testing.
What surface Ra do FDA medical molds require?
Disposable housing molds typically need Ra ≤0.2 μm. Transparent syringes, microfluidic chips and implant mold cavities need SPI A1 mirror finish with Ra ≤0.02 μm to prevent bacterial adhesion and molded part blemishes.
Is heat treatment needed for NAK80 medical mold inserts?
NAK80 arrives pre-hardened to HRC 38–42. No vacuum hardening is required. This makes it ideal for fast-turn medical prototype tooling without risking heat-treatment distortion.
How to stop S136 stainless steel from discoloring during machining?
Use continuously filtered flood coolant. Keep cutting speeds steady, and avoid prolonged rubbing cuts that build up local heat. Heat spots will turn into permanent brown stains after polishing.
Are plating treatments allowed on medical mold cavities?
Nickel and hard chrome plating are banned for FDA medical cavities due to particle shedding risk. If extra wear resistance is needed for glass-filled PEEK, apply thin DLC PVD coating only on non-cavity sliding surfaces.