Published:Zorapid.Ltd
Let’s be honest. Welding aluminum is hard. Welding aerospace-grade aluminum brackets? That’s a whole different level.
You’ve got lightweight designs, tight tolerances, zero room for error. One bad weld, and you’re scrapping a bracket that took hours to machine. Not to mention the paperwork and non-conformance reports.
But here’s the thing: great aluminum TIG welds aren’t magic. They’re the result of following the right steps, using the right equipment, and paying attention to the details that most people skip.
In this guide, we’re sharing the exact tips and techniques we use every day to make aerospace-quality aluminum welds. No fluff, no theory — just what actually works.
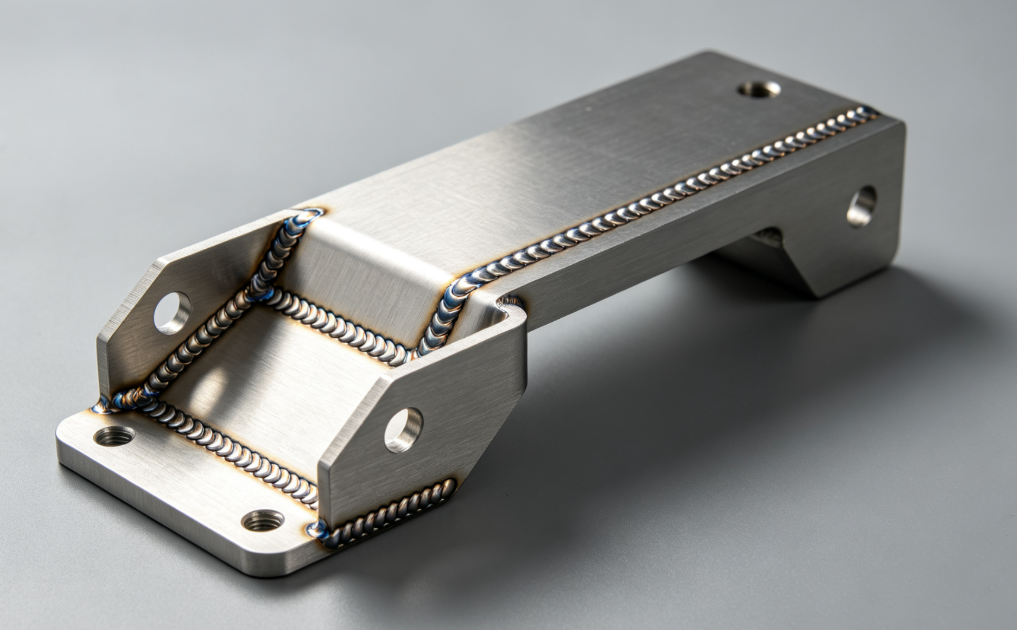
First: Why Aluminum Welding Is So Tricky
Before we get into the tips, let’s talk about why aluminum fights you every step of the way.
1. That Stubborn Oxide Layer
Aluminum instantly forms a thin oxide layer (Al₂O₃) when exposed to air. This oxide melts at about 2072°C. The aluminum underneath? It melts at 660°C.
That’s a huge gap. You have to break through the oxide before the base metal will melt — but if you’re not careful, you’ll blow right through the aluminum underneath.
2. Heat Conductivity Like a Radiator
Aluminum conducts heat about 5x faster than steel. That means the heat from your weld pool spreads out quickly. You need more heat to get started, but once you get going, it’s easy to burn through.
Thin brackets? Even trickier. The heat has nowhere to go.
3. Hydrogen Porosity
Aluminum loves hydrogen. When the weld pool is liquid, it absorbs hydrogen from the atmosphere, moisture, or contamination. When it solidifies, the hydrogen comes out of solution and forms bubbles.
Result? Porosity. Lots of it. And in aerospace? Porosity is a big no-no.
4. Hot Cracking
Some aluminum alloys (like 6061, the most common bracket material) are prone to hot cracking — cracks that form as the weld cools and shrinks.
It’s not about how good your welder is. It’s about material science and joint design.
5. No Color Change
With steel, you can see the color change as it heats up. Red, orange, yellow — you know when it’s about to melt.
Aluminum? It stays silver right up until it melts. No warning. One second it’s solid, the next second you’ve got a hole.
Alright, now that we know what we’re up against, let’s talk about how to beat it.
10 TIG Welding Tips for Aerospace Aluminum Brackets
These are the techniques that separate good enough welds from aerospace-quality welds.
Tip 1: Clean Everything. Then Clean It Again.
This is the tip. And most people don’t do it well enough.
Aluminum welds fail because of contamination. Oil, grease, dirt, oxide, moisture — all of it causes porosity and weak welds.
The proper cleaning routine:
- Degrease with solvent (acetone or isopropyl alcohol) — remove all oil and grease
- Stainless steel wire brush — brush the weld area to remove the oxide layer
- Degrease again — remove any loose particles from brushing
- Weld within 2 hours — the oxide layer starts forming again immediately
Pro tip: Use a dedicated stainless steel brush for aluminum only. Don’t use it on steel or other metals. And never touch the cleaned area with your bare hands — the oil from your skin is enough to cause porosity.
Tip 2: Use AC TIG (Not DC)
For aluminum, you need alternating current (AC), not direct current (DC).
Why? Because AC has a cleaning action during the electrode positive (EP) half of the cycle. It breaks up that stubborn oxide layer on the surface.
DC won’t do that. Try to weld aluminum with DC, and you’ll be fighting the oxide layer the whole time.
Modern TIG tip: Look for machines with adjustable AC balance. More electrode negative (EN) = more penetration, faster welding. More electrode positive (EP) = more cleaning action. For most aluminum, 60-70% EN / 30-40% EP is a good starting point.
Tip 3: Use the Right Filler Metal
Picking the wrong filler is one of the most common mistakes. And it causes all kinds of problems — cracking, porosity, weak welds.
For aerospace brackets (usually 6061-T6 aluminum), here’s what you need to know:
- 4043 filler: Good general-purpose filler. Less cracking, good fluidity. Lower strength.
- 5356 filler: Higher strength, better corrosion resistance. More prone to cracking.
- 4943 filler: Newer formulation, better strength than 4043, good crack resistance.
For 6061 brackets: 4043 or 4943 are usually the best choices. 5356 can work too, but you need to be more careful about joint design and preheat to avoid cracking.
Pro tip: Always use the largest diameter filler that still gives you the control you need. Larger filler = more consistent feed, less chance of dipping the tungsten.
Tip 4: Get the Gas Flow Right
Shielding gas (usually 100% argon) does two things: it protects the weld pool from contamination, and it protects the tungsten electrode.
Too little gas? Porosity and tungsten contamination.
Too much gas? Turbulence that sucks in air — also porosity.
Starting points:
- Cup size #6 or #8 for most bracket work
- 15-25 CFH (cubic feet per hour) flow rate
- Add a gas lens for better coverage, especially on outside corners
- Post-flow: 10-15 seconds minimum (longer for thicker material)
Aerospace pro tip: For critical welds, use a trailing shield too. It keeps shielding gas on the hot weld bead longer as it cools. Less oxidation, better color, stronger welds.
Tip 5: Master the Push Technique
For aluminum, you almost always want to push the torch (forehand technique), not drag it.
Pushing:
- Gives better gas coverage ahead of the weld
- Preheats the base metal
- Produces a wider, shallower weld bead (usually better for thin brackets)
- Gives better visibility of the weld pool
Dragging works for steel, but on aluminum, you’re more likely to get poor fusion and contamination.
Angle: Hold the torch at about 15-20° from vertical, pointing in the direction of travel.
Tip 6: Control Your Heat Input
Aluminum conducts heat fast. Thin brackets conduct heat even faster. Get the heat wrong, and you’ll either have lack of fusion or burn-through.
The approach:
- Start hot — you need extra heat to get the puddle going (remember that oxide layer)
- Back off once the puddle forms — aluminum heats up fast, and you’ll burn through if you keep the same heat
- Travel speed matters — faster = less heat input, slower = more heat
- Use pulse TIG — pulsing the current helps control heat input, especially on thin material
For thin brackets (1.5-3mm): Start with about 80-120 amps, then adjust down once the puddle is established. Use pulse at 1-2 Hz with 50% background current.
Tip 7: Add Filler Correctly
Dipping the filler at the wrong time or in the wrong place causes all kinds of problems — tungsten contamination, cold laps, porosity.
The right way:
- Dip into the leading edge of the weld pool, not the middle or back
- Dip consistently — every 1-2 seconds, depending on travel speed
- Don’t remove the filler from the shielding gas — keep the hot end of the rod under the gas cup at all times
- Cut the filler cleanly — a frayed end can cause contamination
Common mistake: Dipping the tungsten into the filler or the weld pool. If you do this, stop, grind the tungsten, and clean the weld area before continuing. Contaminated tungsten = bad welds.
Tip 8: Watch for Hot Cracking
Hot cracking is a big problem with 6061 aluminum. The weld shrinks as it cools, and if it can’t shrink freely, it cracks.
How to prevent it:
- Use the right filler — 4043 or 4943 are more crack-resistant than 5356
- Joint design — avoid sharp corners and high restraint
- Don’t over-weld — bigger welds = more shrinkage = more cracking
- Back-step welding — weld in short segments going backward to reduce stress
- Preheat — for thick sections or high-restraint joints, preheat to 150-200°C
Aerospace note: Always follow the weld procedure specification (WPS). If you don’t have one, get one. Aerospace welding isn’t something you wing.
Tip 9: Pay Attention to Tungsten Preparation
The tungsten electrode is the heart of TIG welding. Get it wrong, and nothing else matters.
For aluminum AC TIG:
- Use pure tungsten (green) or zirconiated tungsten (brown) — they handle AC better
- Ball the end — don’t grind a point like you would for DC steel. AC works better with a rounded tip
- Keep it clean — if you contaminate it (touch the pool or filler), stop and grind it
- Size matters — use the smallest tungsten that can handle the amperage
Pro tip: For precise bracket welding, use a 1.6mm or 2.4mm tungsten. Smaller diameter gives you better arc control.
Tip 10: Post-Weld Treatment Matters
The weld isn’t done when you lift the torch.
Post-weld steps for quality:
- Let it cool under shielding gas — post-flow is important
- Wire brush the weld — remove the weld soot and oxide
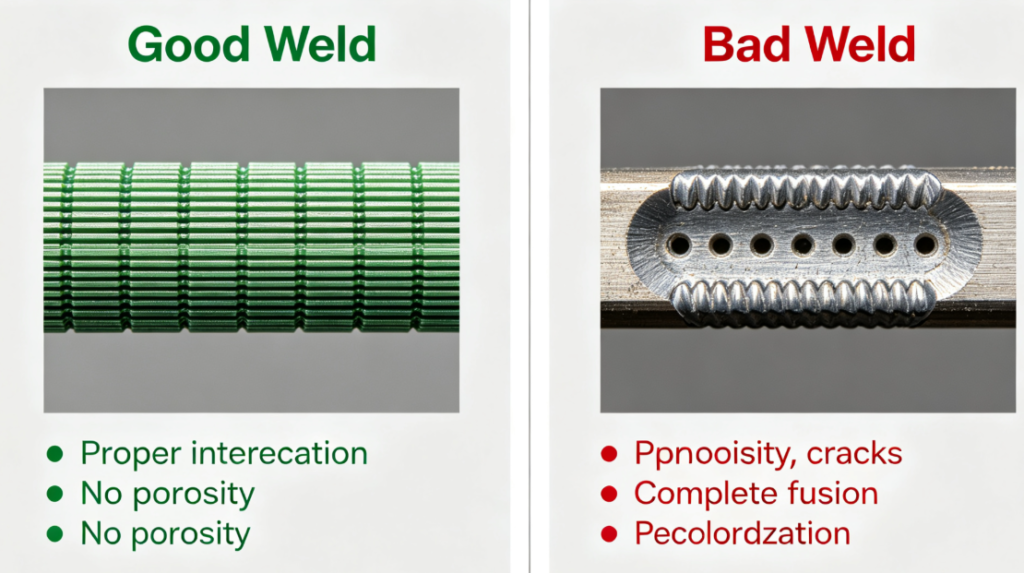
- Inspect visually — check for cracks, porosity, incomplete fusion
- Dye penetrant inspection (for aerospace critical parts) — find surface cracks you can’t see
- Stress relief (if needed) — for high-restraint or critical welds
And most importantly: Document everything. Weld parameters, filler lot, welder ID, date — all of it. In aerospace, if it’s not documented, it didn’t happen.
Common Weld Defects (And How to Fix Them)
Even the best welders get defects sometimes. Here’s how to spot them and what to do.
Porosity
What it looks like: Small holes or bubbles in the weld.
What causes it: Contamination (oil, dirt, moisture), poor gas coverage, dirty filler.
How to fix it: Clean everything better. Check gas flow and leaks. Use a gas lens. Make sure filler is clean and dry.
Tungsten Inclusion
What it looks like: Small dark spots in the weld (tungsten particles).
What causes it: Dipping the tungsten into the pool or filler.
How to fix it: Grind the tungsten to a clean shape. Clean the weld area. Practice your filler technique.
Incomplete Fusion
What it looks like: The weld didn’t fuse properly to the base metal.
What causes it: Not enough heat, too fast travel speed, wrong angle.
How to fix it: Turn up the amperage. Slow down. Make sure you’re getting proper penetration.
Burn-Through
What it looks like: A hole in the weld.
What causes it: Too much heat, too slow travel speed, too small gap.
How to fix it: Turn down the amperage. Travel faster. Use pulse TIG for better heat control.
Hot Cracking
What it looks like: Cracks in the center of the weld bead.
What causes it: Wrong filler, high restraint, too much weld reinforcement.
How to fix it: Switch to a more crack-resistant filler (4043, 4943). Reduce weld size. Use back-step welding. Consider preheat.
Aerospace-Specific Requirements
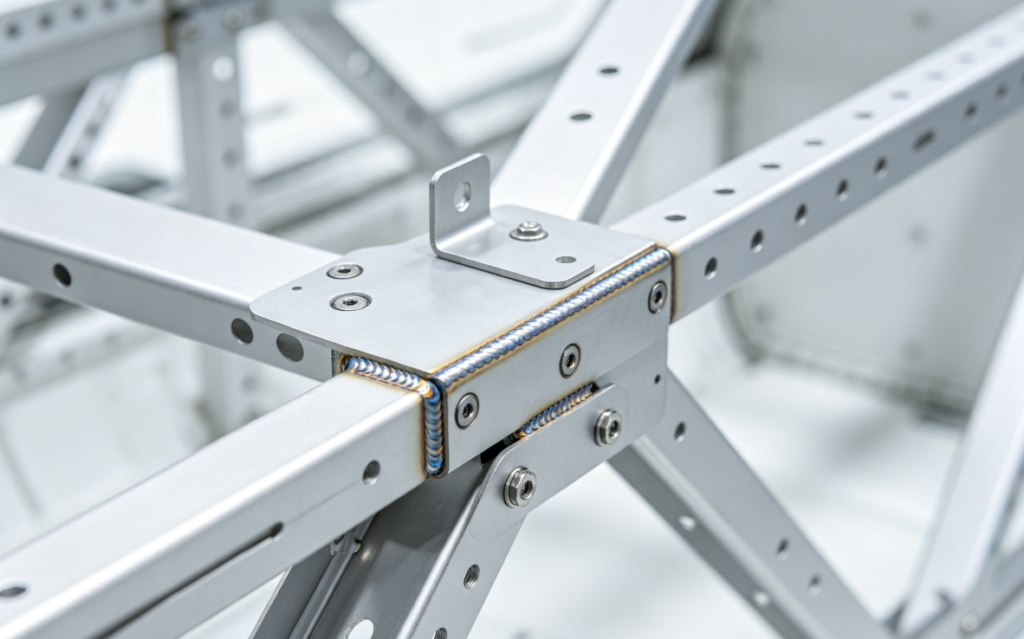
If you’re welding for aerospace, you know the rules are different. Here’s what you need to know.
Certifications Matter
- Welder qualifications: Every welder needs to be qualified per AWS D17.1 or the applicable spec
- Procedure qualifications: Every weld procedure needs to be tested and approved
- Traceability: Every weld, every filler rod lot, every heat lot of material — all tracked
Inspection Is Non-Negotiable
- Visual inspection — 100% of welds
- Dye penetrant (PT) — for surface defects
- Radiographic (RT) or ultrasonic (UT) — for internal defects on critical welds
- Acceptance criteria — usually per AWS D17.1 Class A or the customer spec
Documentation Is Everything
- Weld maps showing every weld
- Weld log with parameters, welder ID, date
- Material and filler traceability
- Inspection reports
- Non-conformance reports (if needed)
It’s a lot of paperwork. But in aerospace, it’s not optional.
Real-World Example: Satellite Bracket Welding
A satellite component company came to us with a problem. Their aluminum brackets were failing weld inspection — porosity, hot cracking, and inconsistent penetration. They needed AS9100 quality, and their current shop just couldn’t deliver consistently.
The project:
- Material: 6061-T6 aluminum brackets, 2mm thick
- Welds: 12 TIG welds per bracket, both sides
- Requirements: AWS D17.1 Class A, 100% visual + dye penetrant
- Quantity: 50 brackets
- Previous reject rate: 35%
What we did:
1: Process Development (2 days)
- Tested 4043 vs 5356 filler → chose 4943 for best balance of strength and crack resistance
- Optimized AC balance and pulse parameters
- Developed a complete WPS (Weld Procedure Specification)
2: Welder Qualification (1 day)
- Qualified our welders per AWS D17.1
- Test coupons passed bend tests, tensile tests, and visual inspection
Step 3: Production (5 days)
- Strict cleaning procedure (degrease → stainless brush → degrease again)
- AC TIG with pulse, gas lens, and trailing shield
- Back-step welding sequence to minimize distortion and stress
- 100% visual inspection after each weld
4: Final Inspection (2 days)
- Dye penetrant inspection on all welds
- Dimensional verification
- Full documentation package
The results:
- 0% reject rate on first article inspection
- 0% reject rate on all 50 brackets
- Delivered 3 days ahead of schedule
- Customer saved 28% compared to their previous supplier (because no rework)
They went from 35% rejects to zero. And it wasn’t magic — it was following the right procedures, using the right equipment, and paying attention to every detail.
The Zorapid Aerospace Welding Advantage
Can weld aluminum. But aerospace-quality welding? That’s a different standard.
Here’s what you get with us:
AS9100 Certified Quality
We’re AS9100D certified — the aerospace quality standard. That means documented processes, traceability, and continuous improvement.
Certified Welders
Our welders are qualified to AWS D17.1 and customer-specific requirements. They don’t just “know how to weld” — they’re certified to weld to aerospace standards.
Complete Documentation
Weld maps, WPS, WPQ, material certs, inspection reports — you get the full package. Everything you need for your quality records and customer audits.
In-House Machining + Welding
We don’t just weld. We machine the brackets too. That means we control the whole process — from raw material to finished welded assembly. No finger-pointing between the machine shop and weld shop.
Full Inspection Capabilities
- Visual inspection (100%)
- Dye penetrant (PT)
- CMM dimensional inspection
- Pressure testing (for pressure vessels)
- Full NDT coordination with certified partners
FAQ
Why is TIG the best process for aerospace aluminum brackets?
TIG (GTAW) gives you the most control over the weld pool, produces the cleanest welds, and works great on thin material. You can precisely control heat input, which is critical for thin, lightweight brackets. MIG is faster but produces more spatter and less precise welds. For aerospace quality, TIG is the standard.
What filler metal should I use for 6061 aluminum?
For most aerospace bracket applications, 4043 or 4943 are the best choices. 4043 is a classic general-purpose filler with good crack resistance. 4943 is newer — it has better strength than 4043 while still maintaining good crack resistance. 5356 is stronger but more prone to hot cracking, so it needs more careful procedure development. Always follow your WPS or engineering specification.
Why do I get porosity in aluminum welds?
Porosity is almost always caused by contamination. The main culprits: 1) Dirty base metal (oil, grease, oxide), 2) Dirty or damp filler rod, 3) Poor shielding gas coverage (leaks, too little flow, turbulence), 4) Welding in a drafty area. Fix: Clean everything thoroughly, check your gas setup, and use a gas lens for better coverage.
Do I need to preheat aluminum before welding?
It depends. For thin material (under 3mm) and simple joints, usually no preheat is needed. For thicker material (6mm+), high-restraint joints, or when using crack-prone fillers like 5356, preheating to 150-200°C can help prevent hot cracking and improve fusion. Always follow the WPS — don’t just guess.
What’s the difference between AC and DC TIG?
DC (direct current) is used for steel, stainless, and most other metals. AC (alternating current) is used for aluminum. The reason is the oxide layer on aluminum — the electrode positive (EP) part of the AC cycle breaks up the oxide, which is essential for good fusion. Welding aluminum with DC is possible but very difficult and not recommended for quality work.
How do I prevent hot cracking in 6061 welds?
Hot cracking is common in 6061 because it’s a heat-treatable alloy. Ways to prevent it: 1) Use a crack-resistant filler like 4043 or 4943, 2) Don’t over-weld — smaller weld beads shrink less, 3) Use back-step or skip welding to reduce stress, 4) Avoid high-restraint joint designs when possible, 5) Preheat for thick or high-restraint joints, 6) Control heat input — too much heat makes it worse.
What shielding gas should I use for aluminum TIG?
100% argon is the standard for most aluminum TIG welding. It provides good cleaning action and good arc stability. For thicker material or higher amperage, you can use argon-helium mixes (75% He / 25% Ar is common) for more heat and deeper penetration. For most bracket work (1-4mm thick), straight argon works great.
How do I know if my weld is aerospace-quality?
Aerospace welds are inspected to specific standards — usually AWS D17.1 or the customer’s own specification. Common requirements: 1) No cracks, 2) No porosity above a certain size and density, 3) Complete fusion, 4) Acceptable weld profile (not too convex, not too concave), 5) Proper penetration. The only way to know for sure is proper inspection — visual, dye penetrant, and sometimes radiographic or ultrasonic.
Can you weld 6061-T6 without losing strength?
The weld itself and the heat-affected zone (HAZ) will be softer than the T6 base metal — that’s unavoidable with fusion welding. 6061-T6 gets its strength from heat treatment, and the welding heat destroys that treatment in the area around the weld. How much strength you lose depends on the filler and procedure. You can restore some strength with post-weld heat treatment, but that’s not always practical or allowed. For critical structural applications, make sure your engineering team has calculated the weld strength into the design.
What certifications do you have for aerospace welding?
A: We’re AS9100D certified (aerospace quality management system). Our welders are qualified to AWS D17.1 (aerospace welding specification), and we can qualify to customer-specific requirements as well. We maintain full traceability on all materials and welds, and we provide complete documentation packages with every order.
Do you provide weld procedure development?
A: Yes, that’s one of our strengths. If you have a new part or assembly, we can develop and qualify a complete WPS (Weld Procedure Specification) for you. We’ll test different parameters, fillers, and techniques, then qualify the procedure with test coupons (tensile, bend, hardness, etc.). You get a fully documented, qualified procedure that you can use for production.
How do I get started with a welded aerospace bracket project?
Send us your drawings and specifications. Tell us the material, quantity, any certification requirements, and your timeline. We’ll review the design, suggest any DFM improvements for weldability, and give you a complete quote with lead time. We can also provide first article inspection (FAI) documentation if needed.
Ready for Aerospace-Quality Welds?
If you’re tired of:
- Porosity and defects that fail inspection
- Welders who don’t understand aerospace requirements
- Missing documentation and traceability
- Inconsistent quality from batch to batch
Then let’s talk.
We don’t just weld aluminum. We weld aluminum to aerospace standards — with certified procedures, certified welders, and complete documentation. Every weld, every time.
Send us your drawings and specs today. We’ll review them, give you a real quote, and tell you exactly what to expect.
No fluff. No defects. Just precision TIG welds, done right.
Zorapid — Aerospace TIG Welding for Lightweight Structures
3000㎡ Smart Manufacturing Center | Zhongshan, Guangdong